Imagine stepping onto your porch this October and being greeted by a softly glowing Hogwarts crest, a majestic Hedwig silhouette, or the unmistakable lightning scar hovering in mid-air — all carved from real pumpkins. For millions of Harry Potter fans, Halloween isn’t just about candy and costumes; it’s the perfect opportunity to bring the magic of the Wizarding World into the real world through spectacular jack o’ lantern designs.
If you’ve ever searched for “Harry Potter jack o lantern” ideas only to find scattered Pinterest pins, outdated stencils, or overly complicated patterns, you’re not alone. Many guides stop at a handful of basic designs or link to low-resolution images that are impossible to trace properly. That changes today.
As a lifelong Potterhead who has carved more than 50 Harry Potter-themed pumpkins over the past decade, followed official Wizarding World collaborations (including the annual Pumpkin Freak partnerships), and stayed active in carving communities on Reddit, Etsy, and Instagram, I’ve created this ultimate 2026 guide. Here you’ll find more than 25 carefully curated Harry Potter jack o lantern ideas, free and printable stencil sources, beginner-to-advanced step-by-step tutorials, lighting tricks, preservation hacks, no-carve alternatives, and expert tips to help your creations last through Halloween night and beyond.
Whether you’re a first-time carver preparing a family-friendly Gryffindor lion, a seasoned artist aiming for a multi-pumpkin Great Hall display, or a parent looking for mess-free options for young witches and wizards, this comprehensive resource will help you create show-stopping pumpkins that capture the enchantment of J.K. Rowling’s world.
Why Harry Potter Jack O Lanterns Are the Ultimate Halloween Magic
Few franchises blend so perfectly with Halloween as Harry Potter. The books and films are filled with references to the holiday: the Great Hall floating with hundreds of jack-o’-lanterns in Harry Potter and the Philosopher’s Stone, Nearly Headless Nick’s Deathday Party, the spooky decorations at Hogwarts every October. Pumpkins aren’t just decoration in the Wizarding World — they’re part of the atmosphere.
Carving Harry Potter jack o lanterns lets you:
- Celebrate your house pride (Gryffindor courage, Slytherin ambition, Ravenclaw wit, Hufflepuff loyalty)
- Create Instagram- and TikTok-worthy porch displays that stand out in your neighborhood
- Bond with family or friends over a shared love of the series
- Express creativity through one of the most beloved fandoms of all time
In 2026, trends have evolved. More carvers are using battery-operated LED candles for safety and longer burn time, incorporating glow-in-the-dark paint accents, choosing eco-friendly or reusable foam pumpkins, and drawing inspiration from recent fan content including Hogwarts Legacy aesthetics and the growing nostalgia wave around the original films’ 25th anniversaries.
Essential Tools & Materials for Magical Pumpkin Carving
Success starts with the right equipment. Here’s what experienced carvers recommend in 2026:
Basic Kit (Beginner-Friendly)
- Fresh pumpkin (medium to large size works best for detailed designs; choose one with a flat face)
- Pumpkin carving kit (most include scoop, saws of different sizes, poker/etching tool)
- Permanent marker or dry-erase marker for tracing
- Petroleum jelly or cooking spray (to preserve freshness)
- Small LED tea lights or string lights (safer and brighter than real candles)
Upgraded Tools for Intermediate & Advanced Carvers
- Linoleum carving tools or wood-carving gouges for finer shading and layering
- Dremel rotary tool with small bits (excellent for detailed etching and 3D effects)
- Power drill with spade bits (for perfect circle eyes or quick large cutouts)
- Flexible LED light strips (for illuminating large interior scenes)
- Battery-powered fairy lights (great for floating candle illusions)
No-Carve & Kid-Safe Alternatives
- Acrylic paints and paint pens
- Black construction paper + Mod Podge for decoupage silhouettes
- Washable markers or glow-in-the-dark paint for temporary designs
- Stickers, vinyl decals, or printable transfers
Preparation & Safety Checklist
- Always carve with adult supervision when children are involved
- Work on newspaper or a large tray to contain mess
- Cut the lid at a 45-degree angle so it won’t fall in
- Scoop out all strings and seeds thoroughly for better light transmission
- Use gloves if you have sensitive skin — pumpkin guts can irritate
Pro tip from years of trial and error: Select pumpkins with thick, smooth flesh rather than very bumpy ones. Thicker walls allow for better depth variation when carving layered designs.
Step-by-Step Pumpkin Carving Tutorial: Beginner to Advanced
Basic Carving Technique (Perfect for First-Timers)
- Choose and Prepare — Wash the pumpkin, dry it, and decide which side will be the face (flattest is best).
- Cut the Lid — Use a serrated knife to cut at an inward angle. Remove and set aside.
- Scoop — Use the scoop tool to remove all pulp and seeds. Scrape the inner wall thin (about ½–1 inch) where you’ll carve for brighter glow.
- Transfer the Pattern — Print your chosen stencil, tape it to the pumpkin, and poke holes along every line with a pushpin or poker tool.
- Outline — Remove paper and connect dots with a permanent marker.
- Carve — Start with the smallest details first. Use short, sawing motions rather than pushing hard. Support the pumpkin wall with your free hand from inside.
- Clean Up — Remove any loose bits with a damp cloth. Insert LED light and test glow.
- Preserve — Rub petroleum jelly on all cut edges and spray the interior with diluted bleach solution (1 tsp bleach per quart of water).
Pro Tips for Clean Cuts & Dramatic Lighting
- Work in short sessions to prevent hand fatigue.
- For sharp corners, use a small saw and pivot carefully.
- Layering is magic: Carve some areas only halfway through for shading (lighter glow), and cut completely through others for bright contrast.
- Best light placement — small LED tea lights on a stable base, or tape battery string lights inside to create floating candle effects.
- Angle the light slightly upward to emphasize facial features.
Advanced Layering & Shading Techniques
Experienced carvers create depth by varying cut thickness:
- Level 1 — Surface etching (remove only skin for subtle glow)
- Level 2 — Medium depth (½ way through flesh)
- Level 3 — Full cut-through for brightest areas
Use a Dremel or gouge to smooth transitions between levels, creating realistic 3D effects on crests, faces, and creatures.
No-Carve & Painted Alternatives
For young children, apartments, or renters:
- Paint the entire pumpkin black, then use white and metallic paint pens for lightning bolts, glasses, house crests.
- Print designs on tissue paper and decoupage them onto the pumpkin.
- Use vinyl cutting machines (Cricut, Silhouette) for perfect house logos and apply as decals.
25+ Best Harry Potter Jack O Lantern Ideas & Stencils
This is the heart of the guide — a massive, curated collection of more than 25 Harry Potter jack o lantern designs organized by difficulty and theme. I’ve drawn from timeless classics, fan-favorite community creations (especially popular on Reddit’s r/harrypotter and official Wizarding World inspirations), and fresh 2026 twists.
For each idea, you’ll find:
- Difficulty rating (Beginner, Intermediate, Advanced)
- Why it works so well as a jack o lantern
- Brief carving tips
- Where to find free or printable stencils (search terms or direct sources like SpookMaster.net, PumpkinCarving101, or official HarryPotter.com seasonal templates when available)
Many designs pair perfectly with LED lighting for that magical, floating glow effect.
Beginner-Friendly Designs (Simple Outlines, Bold Shapes – Great for Kids & First-Timers)
These are large, clean shapes with minimal fine details — perfect if you’re new to carving or working with children.
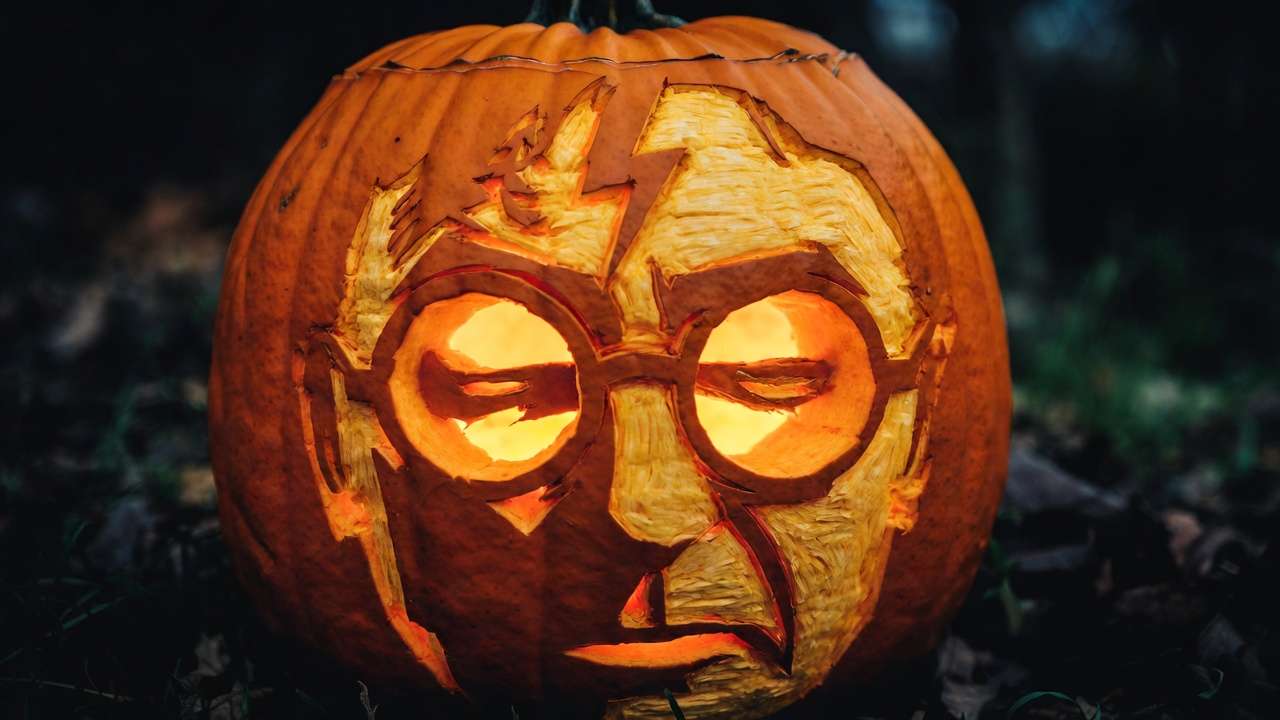
- Lightning Bolt Scar + Round Glasses Difficulty: Beginner Iconic and instantly recognizable. The scar glows brightly as the focal point, with glasses framing it dramatically. Tip: Keep lines thick; use full cut-through for the scar and partial etching for the glasses frames. Stencil sources: Search “Harry Potter lightning scar stencil” on free sites like PrintablePumpkinStencils.com or trace from book covers.
Here are some inspiring examples of this classic design glowing on pumpkins:
- Deathly Hallows Symbol Difficulty: Beginner The triangle, circle, and line make a striking, symmetrical design that looks elegant when backlit. Tip: Use even thickness throughout for balanced glow.
- “Expecto Patronum” Text with Simple Patronus Outline (e.g., stag silhouette) Difficulty: Beginner-Intermediate Add a touch of spell-casting magic. Tip: Etch the text lightly for a misty effect.
- HP Logo (Hogwarts Crest Simplified) Difficulty: Beginner Bold letters with subtle castle background. Stencil: Official-inspired versions often appear on HarryPotter.com Halloween pages.
 Iconic Character Pumpkins
Bring your favorite witches and wizards (and creatures) to life.
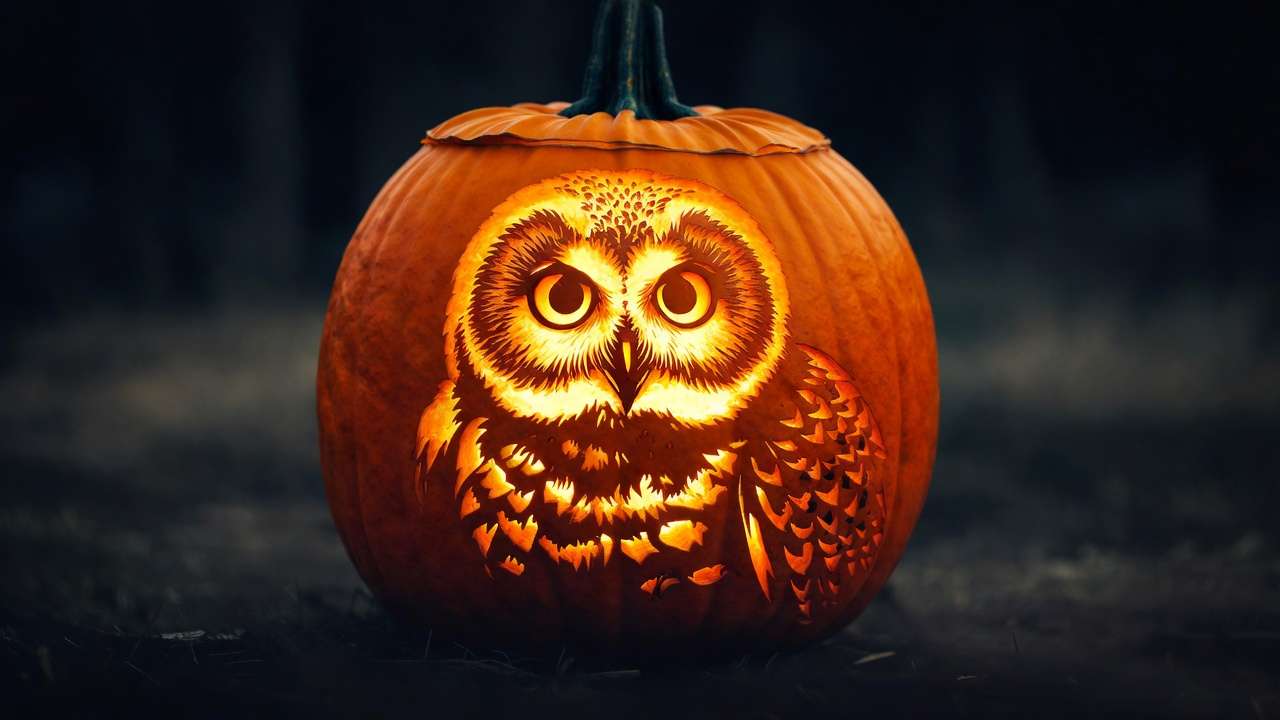
5–8. Harry Potter Portrait (face with scar and glasses) Difficulty: Intermediate Hedwig the Owl — one of the most requested and beloved designs Difficulty: Intermediate Hermione Granger (bushy hair, wand raised) Difficulty: Intermediate Ron Weasley (with wand or chess piece) Difficulty: Intermediate
Hedwig especially shines — her wings and eyes create beautiful light patterns.
Check out these glowing Hedwig and character-inspired masterpieces:
9–11. Severus Snape (flowing hair, intense eyes), Dobby the House-Elf, Lord Voldemort (snake-like features) Difficulty: Intermediate-Advanced Tip: Use shading for dramatic facial expressions.
 Hogwarts House Pride Ideas
Show your allegiance with these house-specific designs.
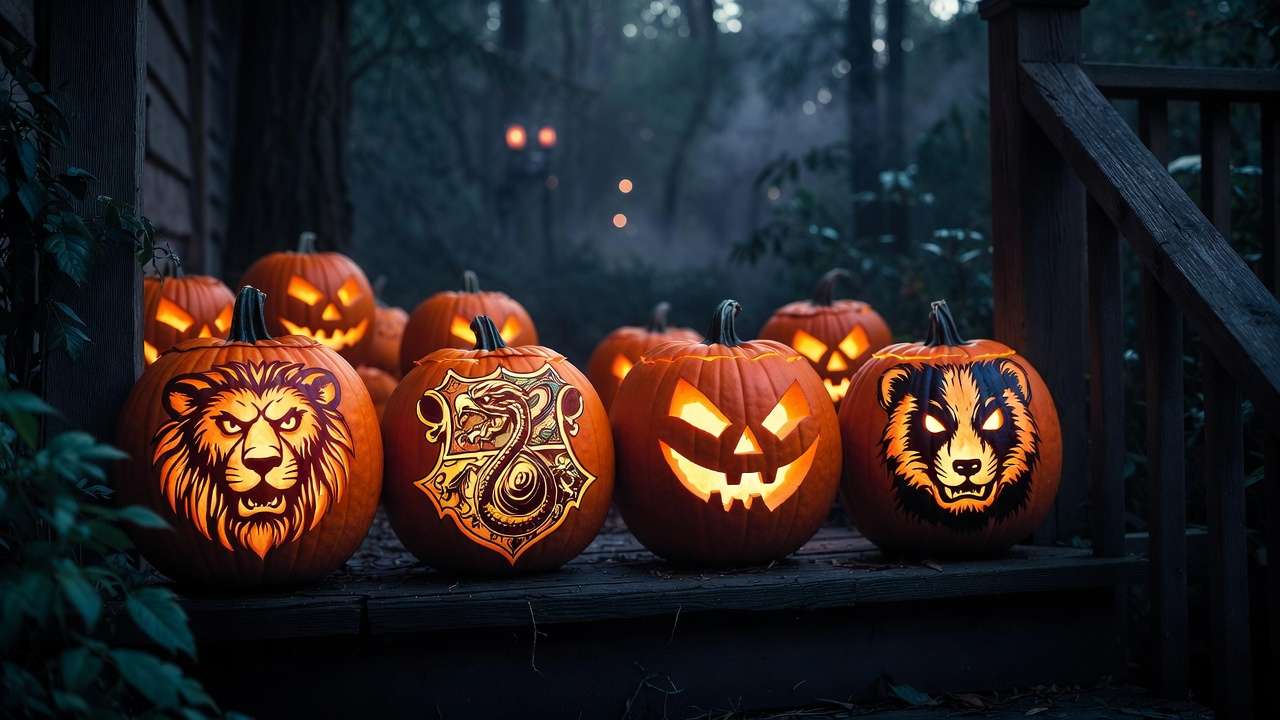
12–15. Gryffindor Lion (roaring head or full body) Slytherin Serpent (coiled snake) Ravenclaw Eagle (wings spread) Hufflepuff Badger (friendly but fierce)
Plus the full Hogwarts House Crests — these are perennial favorites and look stunning in groups of four.
Here are some breathtaking house crest and Hogwarts emblem carvings:
 Magical Objects & Symbols
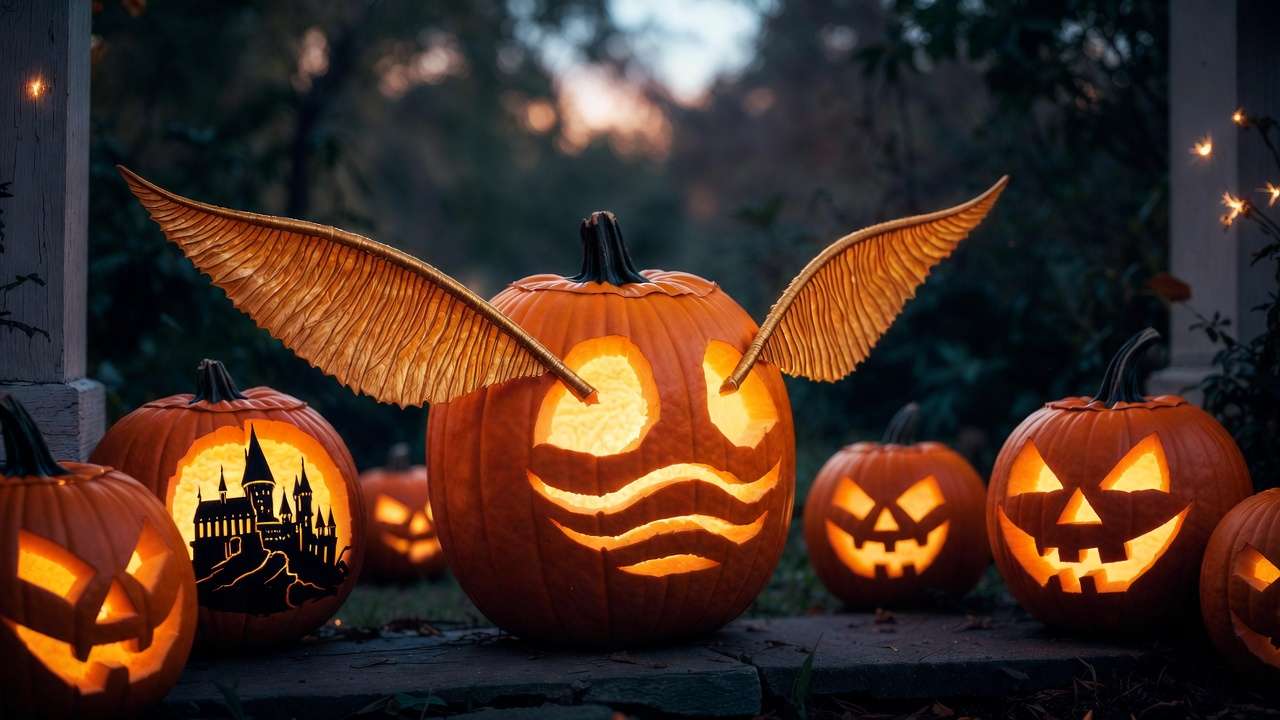
16–20. Golden Snitch (wings spread, perfect for a shiny gold-painted accent) Sorting Hat (with face and patch details) Wizard Wand with Sparks Marauder’s Map Quote (“I solemnly swear that I am up to no good”) Hogwarts Castle Silhouette (towers and windows glowing)
Golden Snitch designs are especially fun and photogenic:
 Spooky & Advanced Masterpieces
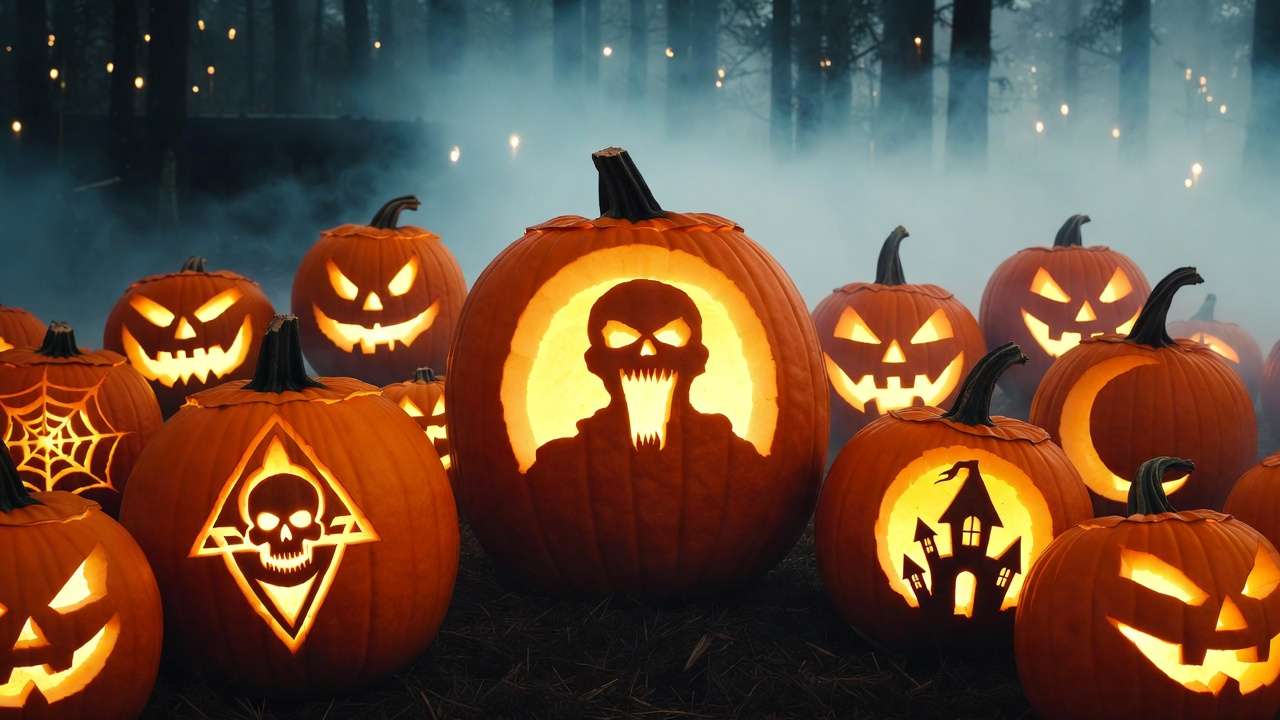
21–25+. Dementor (hooded figure with skeletal hands) Dark Mark (skull and snake — very dramatic) Floating Candles Scene (multiple small pumpkins or one large with candle cutouts) Full Great Hall Recreation (multi-pumpkin display with tables and floating lights) Harry vs Voldemort Duel (profile faces facing off)
These advanced pieces use layering and multiple depth levels for incredible 3D effects.
Here are examples of advanced, spooky, and epic Harry Potter pumpkin art:
Pro Tip for Multi-Pumpkin Displays: Group 3–7 pumpkins together — place taller ones in back, use varying sizes for depth, and connect them with battery fairy lights for a magical scene.
Expert Tips, Common Mistakes & Preservation Hacks (Continued)
After years of carving Harry Potter jack o lanterns (and watching far too many of them collapse into mush before Halloween night), here are the battle-tested tips that separate good pumpkins from legendary ones.
Lighting Magic – Getting That Perfect Wizarding Glow
- LED tea lights remain the gold standard in 2026 — choose warm white (2700K–3000K) for a cozy, candle-like effect rather than cool white.
- For larger or multi-level designs (like Hogwarts crests or Great Hall scenes), use flexible LED fairy string lights taped inside. Drape them along the back wall to create depth and avoid harsh spotlighting.
- Pro move: Place a small mirror or reflective foil at the bottom of the pumpkin to bounce light upward, enhancing facial features and making eyes “sparkle.”
- Battery-operated flameless candles with timers save hassle and look more authentic than real tea lights.
 Avoiding the Most Common Carving Mistakes
- Cutting the lid straight down → It falls in. Always cut at a 45-degree inward angle.
- Scooping too aggressively → Thin walls crack. Aim for ½–¾ inch thickness in carving areas.
- Carving too fast → Results in jagged edges. Use short, controlled sawing motions and take breaks.
- Ignoring pumpkin orientation → Always carve on the flattest, smoothest face for best stencil transfer.
- Using real candles in small or detailed pumpkins → Fire risk + soot buildup. Stick to LEDs.
- Forgetting to test the light placement before final cleanup — many carvers discover shadows ruin the design only after dark.
Preservation Hacks – Make Your Pumpkin Last 7–14+ Days
- Day 1 treatment: After carving, soak the entire pumpkin (inside and out) in a solution of 1 teaspoon bleach per gallon of water for 10–15 minutes. This kills bacteria.
- Daily maintenance: Lightly mist the carved areas with the same diluted bleach solution every evening.
- Edge sealing: Apply a thick layer of petroleum jelly, vegetable oil, or clear nail polish to all cut surfaces. Reapply every 2–3 days.
- Storage trick: Keep pumpkins in a cool place (50–60°F/10–15°C) during the day if possible. Bring them out only for display in the evening.
- Advanced option: Pumpkin preservers (commercial sprays like Pumpkin Fresh) can extend life to 2–3 weeks.
- Bonus 2026 eco-tip: Use biodegradable LED candles and consider carving smaller “companion” pumpkins that can be turned into roasted pumpkin seeds afterward.
Display Ideas to Wow Your Neighbors
- Porch setup: Line steps with house-themed pumpkins (four houses = four perfect pumpkins).
- Floating candle illusion: Suspend battery-powered tea lights inside clear glass jars or use fishing line to hang small carved mini-pumpkins from the porch ceiling.
- Group scene: Create a mini Hogwarts courtyard with castle silhouette in back, Hedwig on one side, and house crests in front.
- Indoor magic: Place a single large masterpiece on a mantel with fairy lights draped around it.
FAQ: Your Harry Potter Jack O Lantern Questions Answered
Here are the questions I see most often in carving communities, Reddit threads, and direct messages:
Q: Where can I find free Harry Potter pumpkin stencils in 2026? A: Excellent free sources include PrintableCarvingPatterns.com, SpookMaster.net (search “Harry Potter”), and PumpkinStencils.com. Many fans also share high-resolution versions on Reddit (r/PumpkinCarving, r/harrypotter). Official Wizarding World seasonal pages occasionally release limited-edition templates around October.
Q: Are there any official Harry Potter jack o lantern stencils? A: Yes — through partnerships with Pumpkin Freak and other licensed creators, the Wizarding World store and HarryPotter.com have released official designs in past years (especially around Halloween promotions). Check those sites in late September/early October for new releases.
Q: How do I make my carving last longer than a few days? A: Follow the preservation steps above: bleach soak, petroleum jelly sealing, daily misting, cool storage, and LED-only lighting. Many carvers report 10–14 days with these methods.
Q: What are the best Harry Potter designs for kids (ages 5–10)? A: Stick to beginner-friendly no-carve options: painted lightning scar + glasses, simple house crests with stickers, or Hedwig decoupage. If carving, use very large, bold patterns like the Deathly Hallows symbol.
Q: Can I use foam pumpkins for Harry Potter jack o lanterns? A: Absolutely! Craft foam pumpkins are reusable, mess-free, and perfect for detailed work. Use exacto knives or wood-burning tools for carving, and they accept paint beautifully for no-carve versions.
Q: How do I transfer a complicated stencil without tearing the paper? A: Tape the printed stencil loosely (not too tight), use a pushpin or thin nail to poke holes every ⅛–¼ inch along all lines, then connect dots with a dry-erase marker. For extra precision, use graphite transfer paper.
Q: What if I mess up a cut? A: Small mistakes can often be fixed with wood filler, hot glue, or by incorporating them into the design (e.g., a “crack” in the scar). For larger errors, switch to a backup pumpkin or go no-carve.
There’s something truly magical about seeing a carved Harry Potter jack o lantern come to life after dark — the moment the LED light flickers on and suddenly your porch is part of Hogwarts. Whether you went simple with a lightning scar, ambitious with a full Great Hall scene, or creative with a no-carve house crest, you’ve just added a little more wonder to Halloween.
Now it’s your turn. Grab a pumpkin (or five), pick your favorite design from this guide, and let your inner wizard shine. When you’re finished, I’d love to hear about your creation — drop a comment below or tag your photos with #HarryPotterJackOLantern on social media. Who knows? Your masterpiece might inspire the next generation of Potterhead carvers.
Happy carving, and may your pumpkins glow brighter than a Patronus in the night! 🎃✨