Once you have mastered the basics of spellcasting, parrying with Protego, and dodging unblockable attacks, the standard enemy encounters scattered across the open world of the Scottish Highlands might start to feel a bit too easy. If you are looking for the ultimate combat challenge to truly test your wizarding skills, you need to step into a Hogwarts Legacy Battle Arena. These specialized, high-intensity combat zones are designed to push your reflexes, spell combos, and tactical resource management to their absolute limits.
Finding these hidden arenas can be tricky, unlocking them requires solving environmental puzzles, and surviving their brutal, five-wave onslaughts demands a flawless strategy. Whether you are hunting for exclusive cosmetic gear, trying to grind experience points to reach the level 40 cap, or aiming to unlock the coveted “Rise to the Challenges” achievement, this comprehensive guide will equip you with everything you need. From exact map locations to the ultimate spell loadouts, here is how you can master every arena in the game.
What is a Hogwarts Legacy Battle Arena?
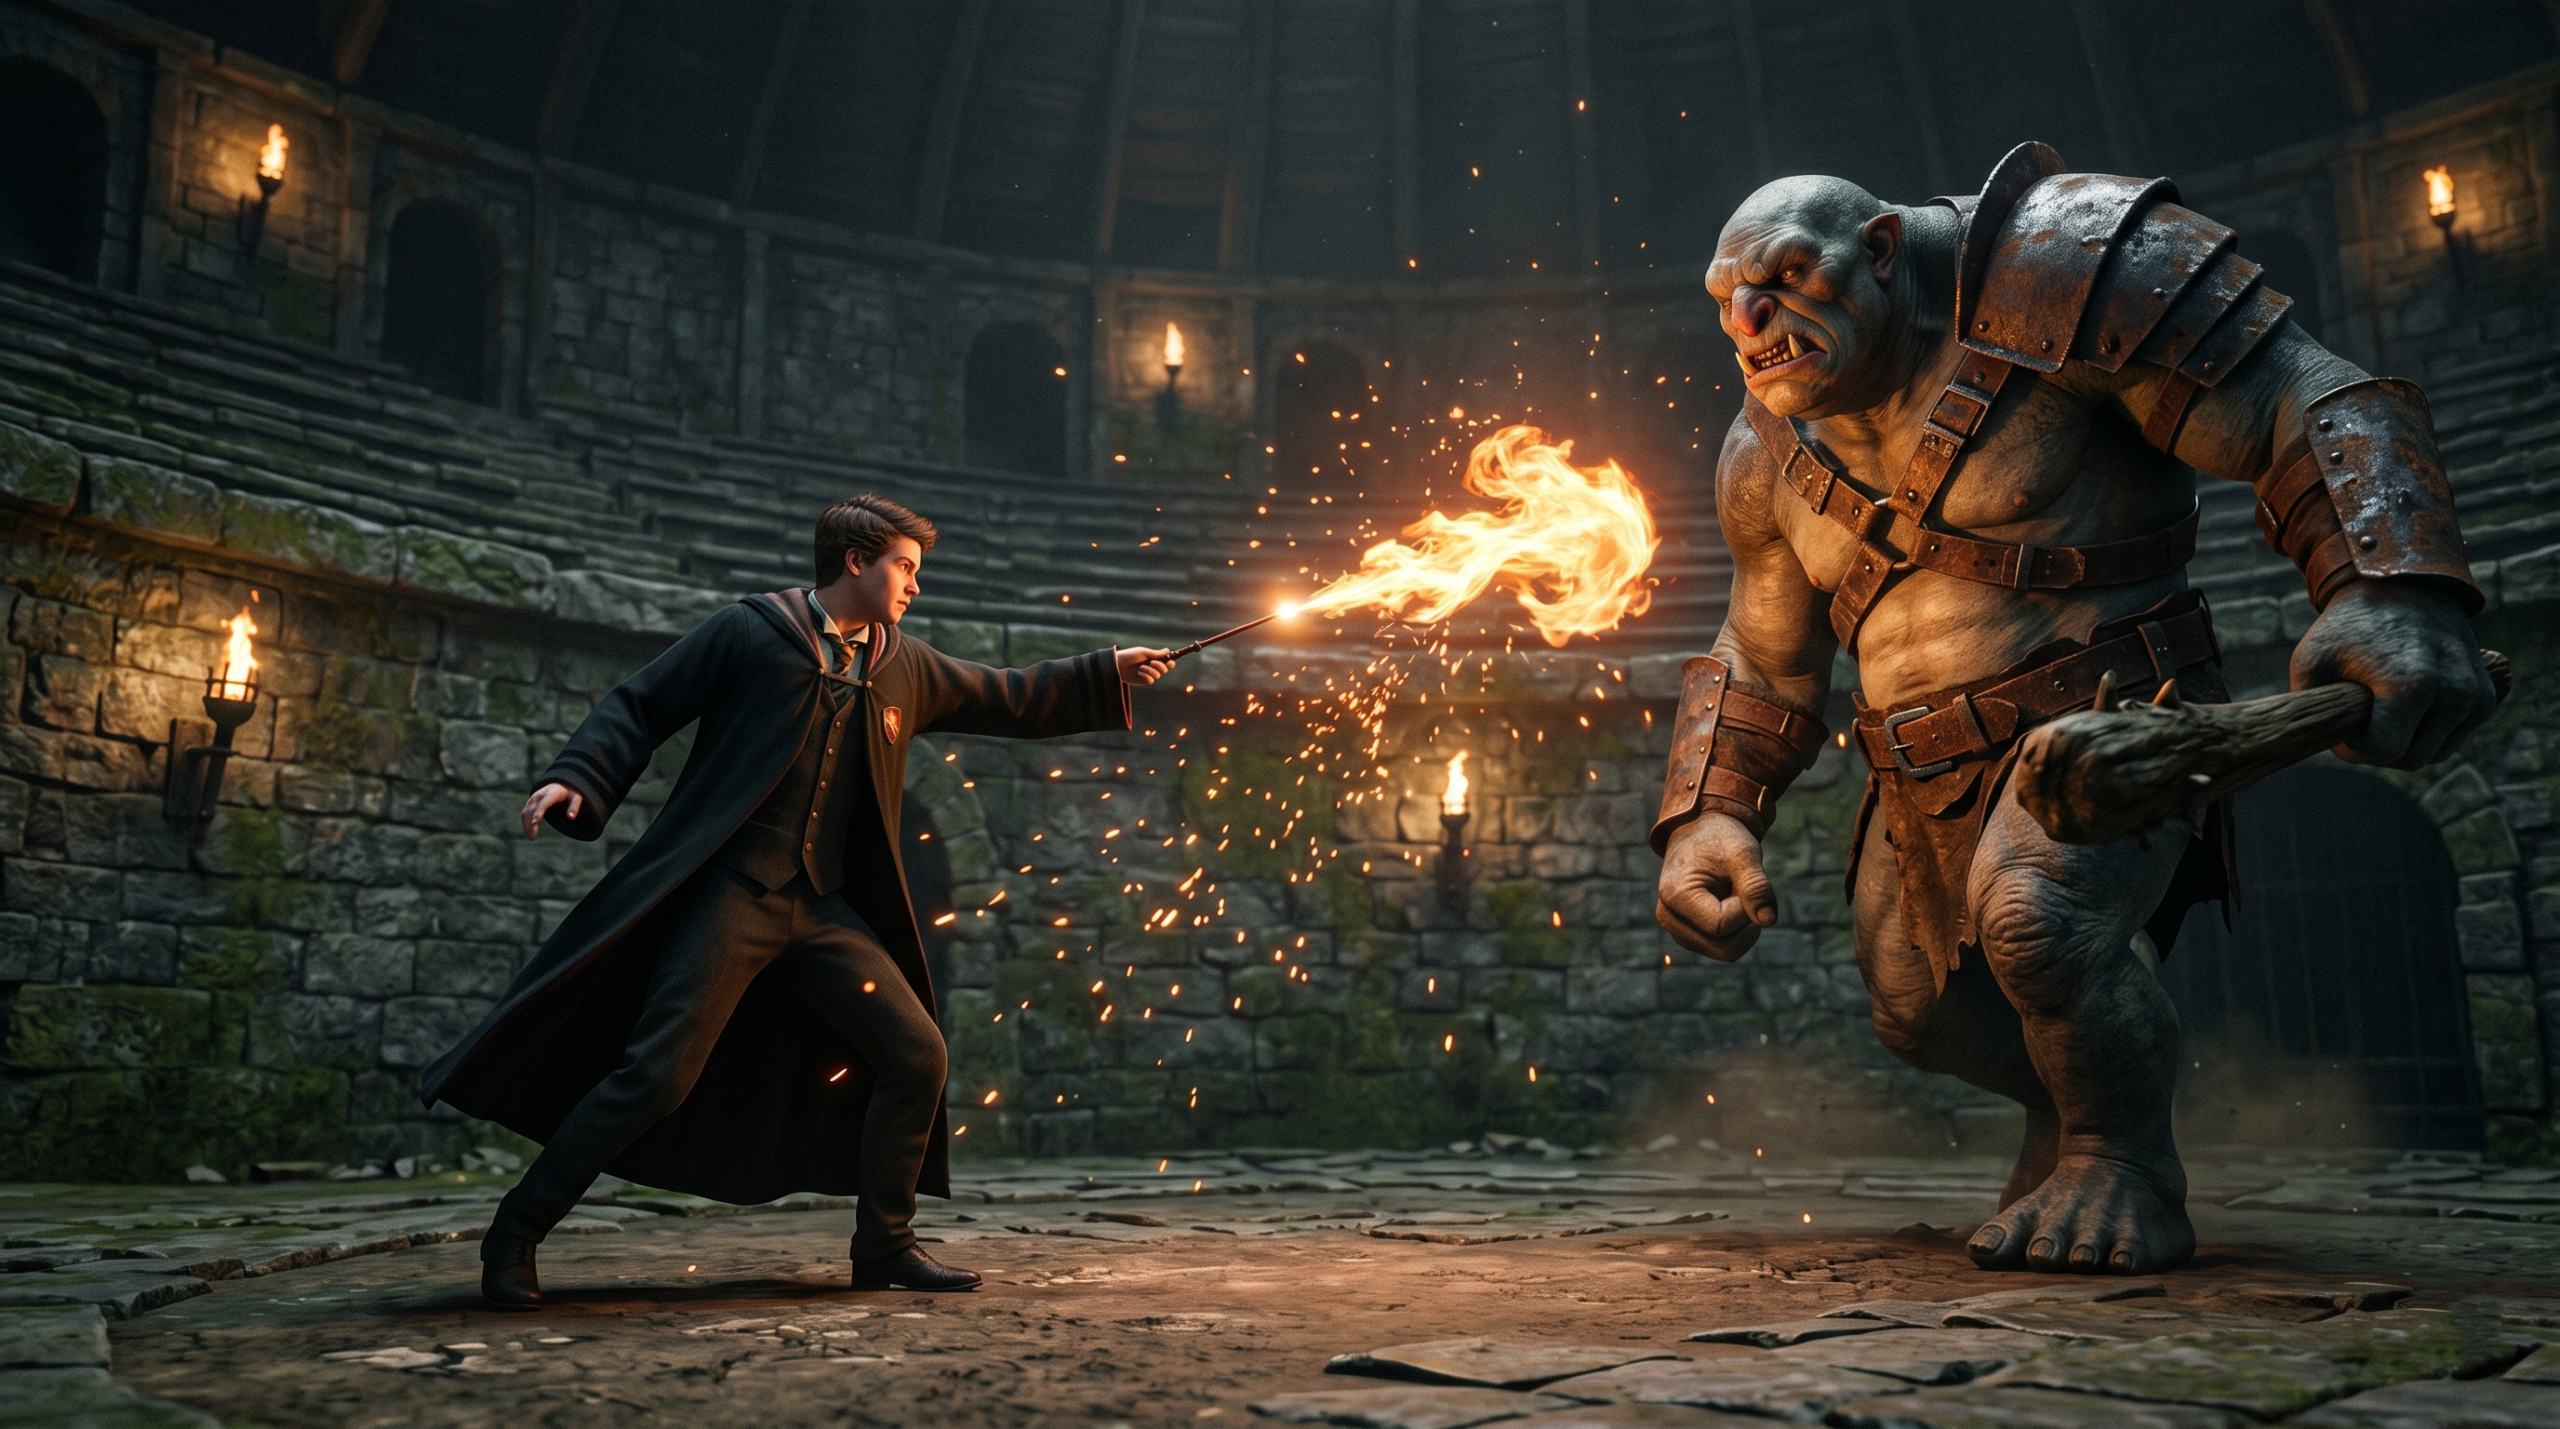
In Hogwarts Legacy, a Battle Arena is an instanced, wave-based combat challenge hidden within the open world. Rather than fighting a handful of enemies at a bandit camp, stepping into an arena pits you against five consecutive waves of increasingly difficult foes. You will face a chaotic mix of Ashwinders, Poachers, Ranrok’s Loyalist Goblins, Armoured Trolls, and Acromantulas—often all at the same time.
 The Mechanics of the Arena
When you activate an arena, you are transported to a closed-off circular battlefield. The rules of engagement are straightforward but demanding:
-
No Escaping: Once the challenge begins, you must defeat all five waves to claim victory. If you fall in battle, your progress for that arena attempt resets, though you will respawn safely outside the statue and can try again immediately.
-
Full Inventory Access: You are not stripped of your items. You have full access to your Wiggenweld Potions for healing, as well as tactical consumables like the Maxima Potion, Edurus Potion, Mandrakes, and Venomous Tentacula.
-
Ancient Magic is Active: Your Ancient Magic meter will fill up as you perform combos and collect dropped blue orbs, allowing you to unleash devastating finisher moves on high-health targets like trolls.
-
Infinite Replayability: Battle Arenas are not one-time events. You can replay them infinitely. This makes them the absolute best location in the game to practice complex spell combinations, farm experience points, and complete your Dueling Feats challenges.
How Many Battle Arenas Are There?
Before you set off on your broom to find these combat trials, it is crucial to understand exactly how many exist in the game, as there is often confusion surrounding the total number.
In total, there are three Battle Arenas in Hogwarts Legacy, but they are divided by game edition and DLC:
-
The Base Game Arenas: Every single player, regardless of which version of the game they purchased, has access to two standard arenas. These are the North Ford Bog Battle Arena and the Feldcroft Battle Arena.
-
The DLC Arena: The third arena is the Dark Arts Battle Arena. This specific location is entirely exclusive to players who purchased the Hogwarts Legacy Deluxe Edition or those who bought the Dark Arts Pack DLC separately from their platform’s digital storefront.
Expert Note: If you are an achievement hunter striving for the Platinum trophy or full Gamerscore, you only need to complete the two base-game arenas to unlock the “Rise to the Challenges” trophy. The Dark Arts arena does not count toward standard game completion.
All Hogwarts Legacy Battle Arena Locations & How to Unlock Them
The arenas are not simply waiting with open doors; they are concealed behind environmental puzzles. When you arrive at an arena location, you will find a large, imposing statue. To activate the combat trial, you must locate and destroy 20 glowing, magical vases scattered in the immediate vicinity of the statue. Casting Revelio repeatedly is your best tool here, as it will highlight the vases in a bright blue hue through walls and foliage.
 North Ford Bog Battle Arena
Located in the far northern reaches of the map, this swampy arena is easily accessible once you unlock the upper regions of the Highlands.
-
Map Location: Fast travel to the East North Ford Bog Floo Flame. From the spawn point, mount your broom and fly directly northeast. You will soon spot a ruined stone structure nestled amongst the dense, fog-covered trees.
-
How to Unlock: Land near the central statue. Cast Revelio to scan the ruins. The 20 vases are relatively clustered together here. Some are resting atop the crumbling stone walls, others are tucked behind large tree roots, and a few are hidden just outside the perimeter of the ruins. A simple basic cast or a quick Confringo will shatter them. Once the counter in the top right of your screen reaches 20/20, a short cinematic will play, the statue will open its arms, and you can interact with it to enter the arena.
Feldcroft Battle Arena
This arena is tied to the southern part of the map and offers a slightly different aesthetic, set amidst rocky highlands and ancient statues.
-
Map Location: This arena is located in the Feldcroft Region, specifically southeast of the town of Feldcroft and southwest of Irondale. Fast travel to the Irondale Floo Flame and head southwest along the rocky coast.
-
How to Unlock: While you can stumble upon this arena naturally, it is actually tied to a specific side quest. Speak to an NPC named Althea Twiddle in Irondale to accept the quest “E-Vase-Ive Manoeuvre”. She will direct you to the ruins. Just like in the North Ford Bog, you must destroy 20 vases. However, the vases here are spread out over a much wider area, requiring a bit more vertical searching. Look up at the cliffsides and behind the large, toppled pillars. Shatter all 20, return to the statue, and prepare for battle.
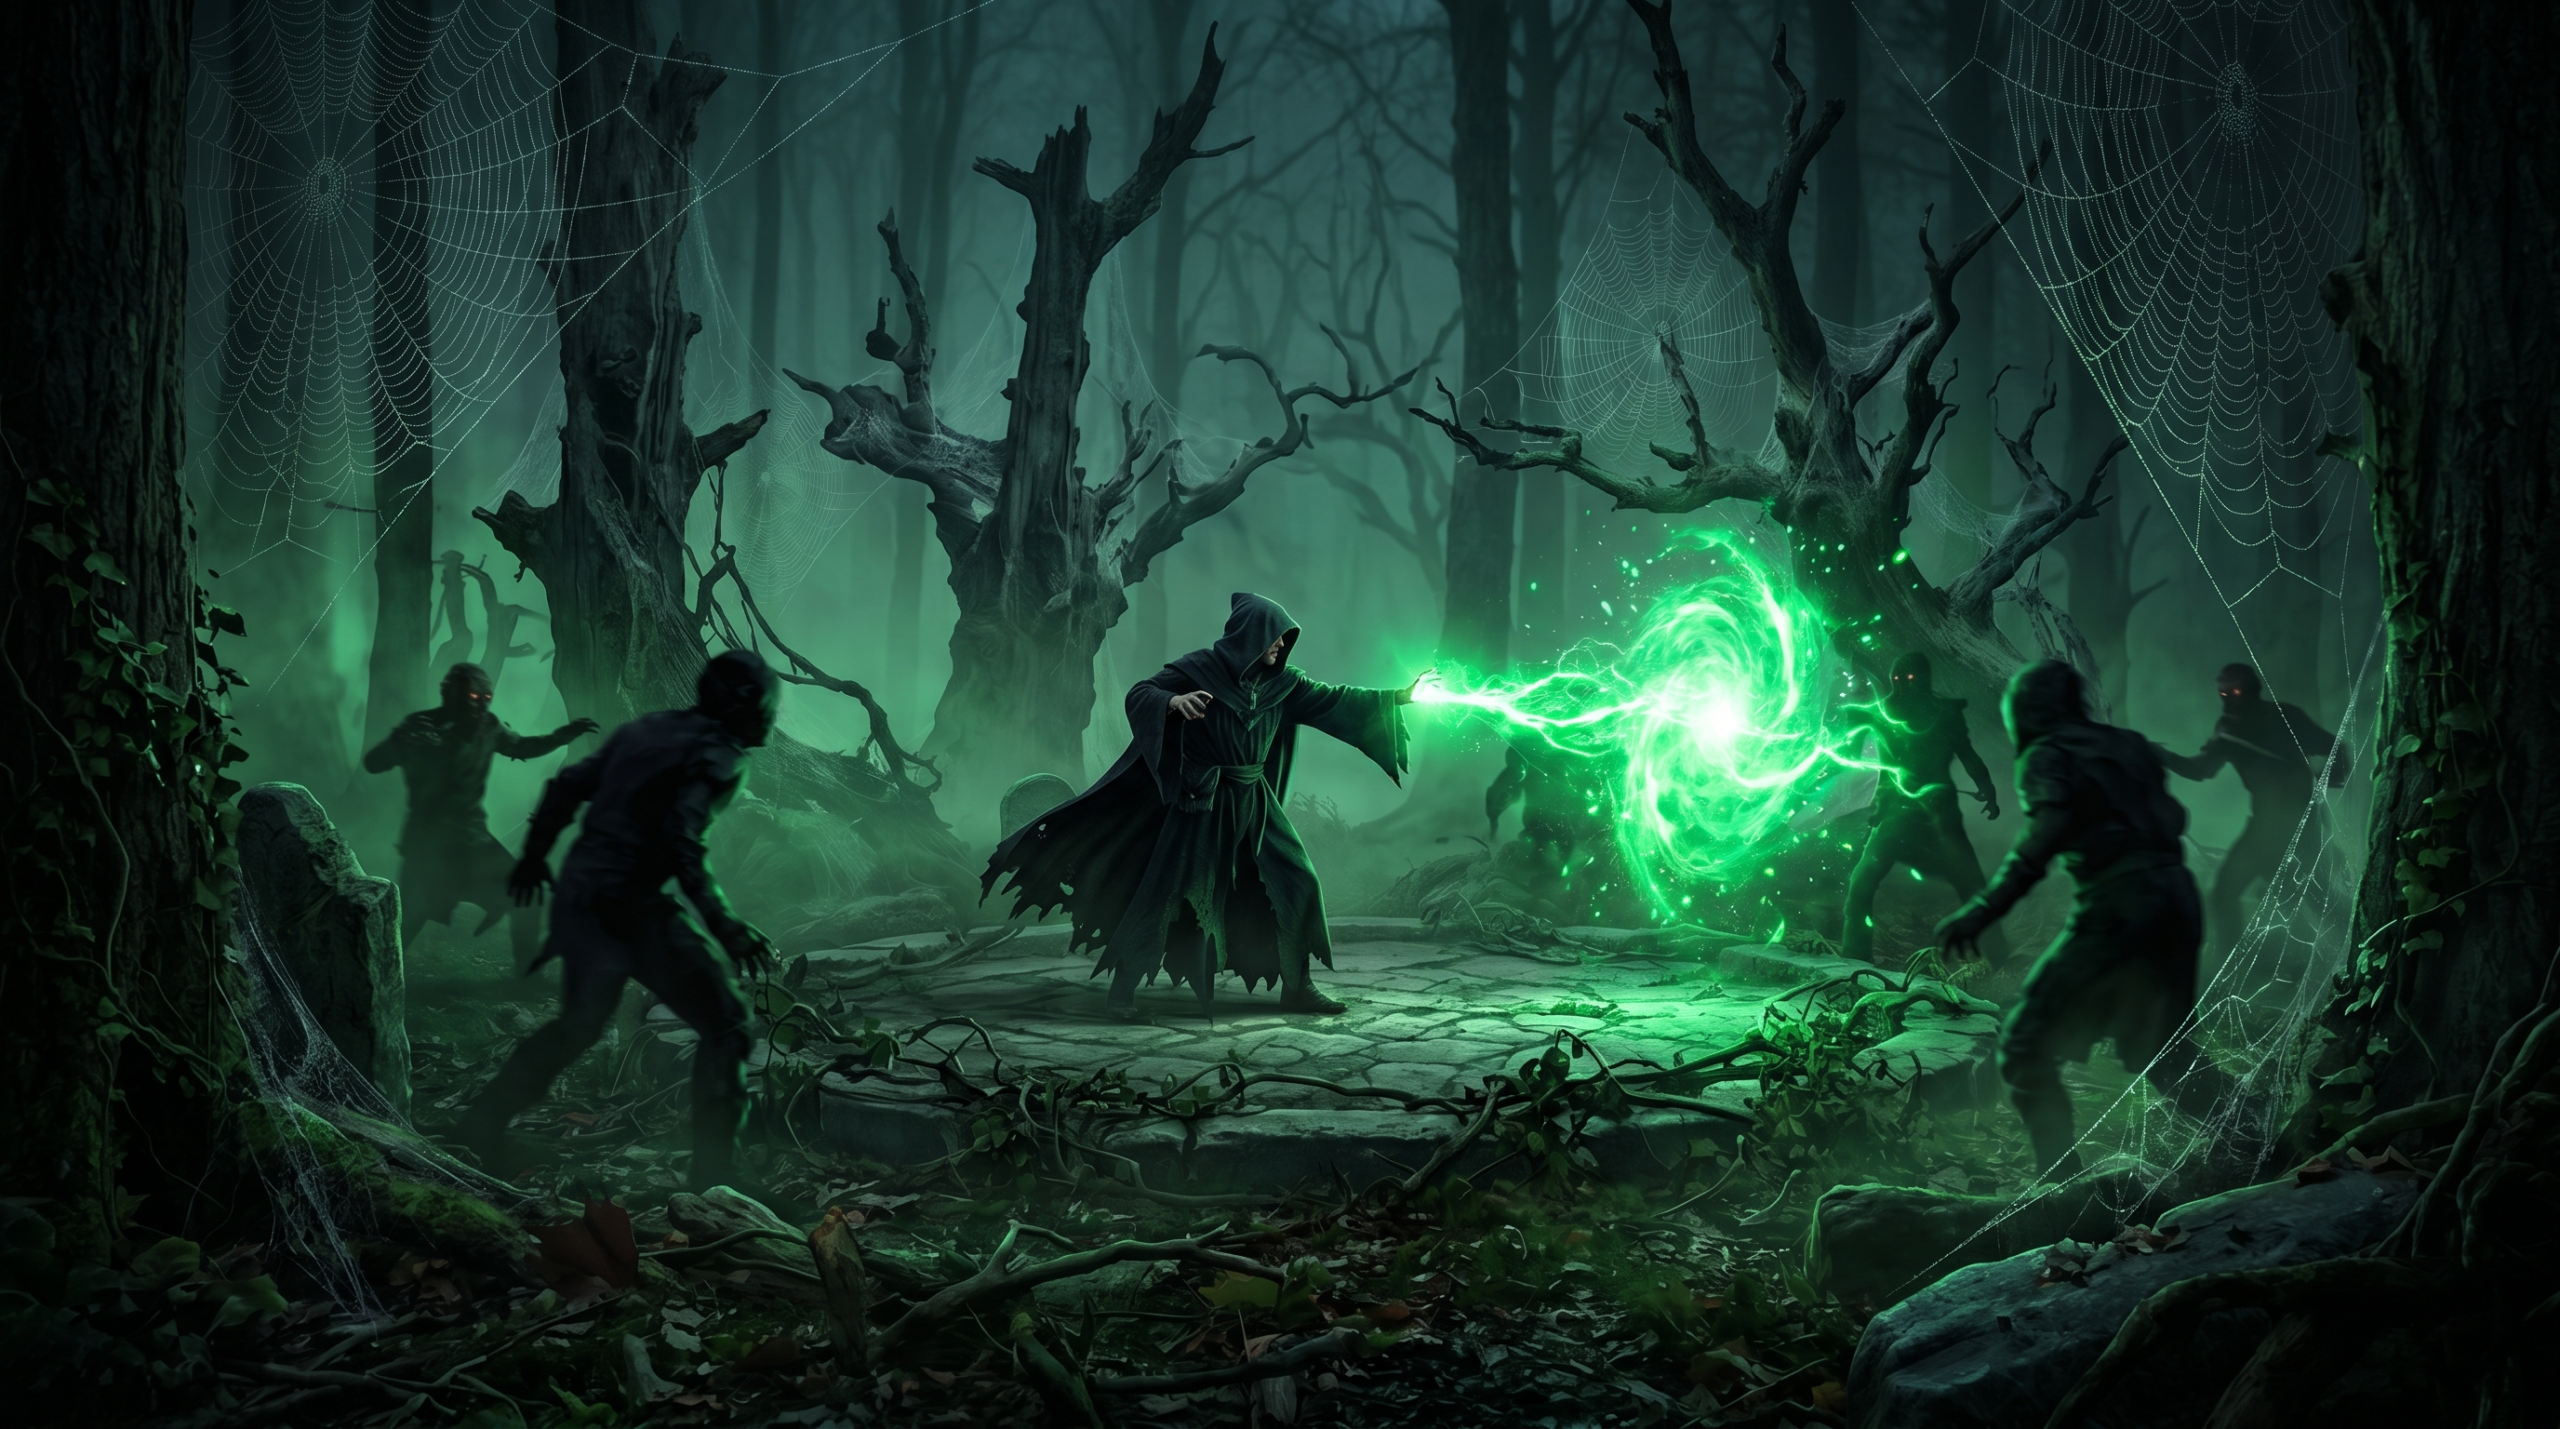
Dark Arts Battle Arena (DLC Exclusive)
Tucked away in the most ominous part of the map, this arena is a dream for players looking to unleash their inner dark wizard.
-
Map Location: This arena is located deep within the Forbidden Forest. The easiest way to reach it is to fast travel to the East North Hogwarts Region Floo Flame and fly straight into the dense forest, heading slightly northwest. Look for an area thick with fog, spiderwebs, and an eerie green glow.
-
How to Unlock: The mechanics remain the same—you must destroy 20 hidden vases. Be highly cautious while hunting for the vases here, as the area immediately surrounding the statue is heavily guarded by high-level Poachers and several venomous spiders. You will likely have to clear out this open-world mob before you can peacefully solve the vase puzzle.
The Best Spells & Combat Strategies for Surviving the Waves
Stepping into a Battle Arena without a meticulously planned spell loadout is a recipe for disaster. The sheer volume of enemies on screen at any given moment means you cannot rely on basic casting and dodging alone. To dominate these combat trials, you need a mix of crowd control, devastating Area of Effect (AoE) combos, and strategic consumable usage.
 Best Crowd Control Spells
When facing a dozen Ashwinder Duelists and loyalist rangers simultaneously, mitigating incoming damage is your top priority. Your spell diamond should always include at least two dedicated crowd control options.
-
Glacius: This is arguably the best utility spell in Hogwarts Legacy. Freezing an enemy not only stops them in their tracks, completely removing them from the fight temporarily, but it also increases the damage of your next attack against them.
-
Transformation: With the Mastery talent unlocked, Transformation turns an enemy into an explosive barrel. You can then use your Ancient Magic Throw to hurl that enemy into a crowd, effectively killing the transformed enemy and dealing massive AoE damage to everyone else.
-
Arresto Momentum: Excellent for slowing down charging targets, particularly the rapid-striking Acromantulas or leaping Dugbogs that spawn in the later waves.
The Ultimate Damage Combos
Surviving the arena requires eliminating enemies quickly before you are overwhelmed. Mastering spell combinations will drastically increase your damage output:
-
The Shatter Combo (Glacius + Diffindo): Freeze your target with Glacius, then immediately follow up with the slashing spell Diffindo. The frozen status amplifies Diffindo’s already high base damage, often resulting in a one-shot kill against standard infantry.
-
The Pull-and-Burn (Accio + Incendio + Depulso): Incendio is incredibly powerful but suffers from an abysmal range. Use Accio to yank an enemy (or a group of them, if you have the mastery talent) right to your feet, blast them with Incendio, and immediately cast Depulso to launch them away as a flaming projectile into other enemies or walls.
-
The Aerial Juggle (Levioso + Descendo): Lift a grounded enemy with Levioso, then brutally slam them into the dirt with Descendo. This combo deals tremendous physical damage and briefly stuns surrounding foes.
Utilizing Plants and Potions
Many players hoard their botanical and brewed resources for boss fights, but the Battle Arenas are precisely where these items shine the most.
-
The Invincible Brawler: If you unlock the Edurus Potion Potency talent, drinking an Edurus Potion makes you completely invincible for 20 seconds. Pair this with a Maxima Potion (which vastly increases spell damage) during Wave 5, and you can stand in the middle of the chaos, ignoring incoming attacks while wiping out elite enemies.
-
Unleashing the Greenhouse: Do not underestimate the combat flora. Tossing out three Chinese Chomping Cabbages creates relentless, passive damage that distracts enemies and breaks their shields. Dropping a Venomous Tentacula in the center of the arena will constantly pepper foes with acid, interrupting their unblockable attacks.
Farming Dueling Feats
As a bonus expert tip, the Battle Arenas are the optimal location to farm “Dueling Feats.” These are the optional mini-challenges that appear in the bottom right corner of your screen during combat (e.g., “Flip a Troll’s club in its face” or “Bury a Matriarch Spider’s head”). Because the arenas offer a concentrated, predictable spawn of diverse enemy types, you can quickly grind out these feats to unlock exclusive cosmetic rewards in your Field Guide. If you need a specific enemy type to complete a feat, simply start an arena, complete the feat, and restart the challenge.
Surviving the Dark Arts Battle Arena: A Special Guide
The Dark Arts Battle Arena operates under a completely different set of rules. When you step through the statue in the Forbidden Forest, your current spell diamond is temporarily overridden. The game forcibly equips you with the three Unforgivable Curses—Crucio (The Torture Curse), Imperio (The Mind Control Curse), and Avada Kedavra (The Killing Curse)—alongside the explosive curse, Confringo.
You are granted access to these curses inside the arena regardless of your actual story progression, making this the perfect place to test out dark magic early in your playthrough.
 Unforgivable Curse Strategies
To conquer the Dark Arts arena, you must embrace the synergetic mechanics of cursing your enemies:
-
Weaponizing Imperio: Always cast Imperio on the largest, most dangerous enemy on the battlefield, such as an Armoured Troll or an Ashwinder Executioner. Not only does this remove a major threat, but the mind-controlled enemy acts as a tank, drawing the aggro of the entire wave while dealing heavy damage on your behalf.
-
Spreading the Pain with Crucio: Cast Crucio on a standard enemy. If you have the Dark Arts talent tree upgraded, hitting a cursed enemy with a basic cast will generate a magical projectile that spreads the curse to another nearby enemy. You can quickly curse an entire wave of Goblins this way.
-
The Avada Kedavra Wipe: Avada Kedavra has the longest cooldown in the game, so it must be used strategically. Do not waste it on a low-level poacher. Save it for the trolls in Wave 5. Alternatively, if you have the Avada Kedavra Mastery talent, killing a single cursed target with the spell will instantly kill every other cursed enemy on the battlefield. By spreading curses with Crucio and then casting Avada Kedavra, you can annihilate Wave 5 in seconds.
Hogwarts Legacy Battle Arena Rewards: Is It Worth It?
Enduring five waves of brutal magical combat is a massive undertaking, but the game ensures your efforts are handsomely rewarded. Completing these combat trials is highly lucrative for three main reasons:
Exclusive Cosmetic Gear
Fashion is a core element of Hogwarts Legacy, and the arenas offer unique transmog unlocks for your character. Defeating the North Ford Bog and Feldcroft arenas rewards you with the Ashwinder Outfit and the Thief’s Coat, allowing you to dress your wizard or witch in a rugged, battle-hardened aesthetic.
 The “Rise to the Challenges” Trophy/Achievement
For the completionists and trophy hunters, mastering the arenas is mandatory. You must successfully clear both the North Ford Bog and Feldcroft Battle Arenas to unlock the “Rise to the Challenges” achievement. Remember: The Dark Arts Battle Arena is DLC content and is not required to earn this trophy or the game’s Platinum trophy.
The Ultimate XP Farm
Perhaps the most practical reward is the sheer volume of Experience Points you gain. Because the enemies in the arena scale to your level, and the density of foes is higher than anywhere else in the open world, replaying the arenas is widely considered the fastest, most efficient method for power-leveling. If you are stuck in the mid-30s and need to grind to the Level 40 cap to finish your talent trees, running the Feldcroft arena on repeat will get you there in record time.
Frequently Asked Questions (FAQs)
Do I lose my potions and plants if I use them in a Battle Arena?
Yes. The Battle Arena is not a simulation; it is real combat. Any Wiggenweld potions, combat plants, or tactical potions you consume during the five waves will be permanently depleted from your inventory. Always ensure you visit your Room of Requirement to restock your supplies before interacting with the arena statue.
What level should I be to try a Battle Arena?
While enemies will dynamically scale to match your current level, it is highly recommended that you wait until you are at least Level 15 to 20 before attempting an arena. You want to ensure you have enough spell slots unlocked, a decent pool of health, and access to crucial talents (like swift dodging and spell cooldown reductions) to survive the swarms.
Can you fail a Battle Arena?
Yes. If your health reaches zero during any of the five waves, your character will fail the trial. You will respawn outside the arena statue unharmed, but all progress for that specific attempt will be lost, and you will have to start back at Wave 1.
Can I change the difficulty during an arena fight?
Yes, you can pause the game at any time and lower or raise the difficulty in the settings menu. If you are struggling to clear Wave 5 on “Hard,” dropping it to “Normal” or “Story” mode will instantly reduce enemy aggressiveness and health pools without penalizing your rewards or trophy progression.
The Hogwarts Legacy Battle Arenas represent the pinnacle of the game’s combat system. They are thrilling, chaotic, and deeply rewarding trials that force you to elevate your gameplay from mindlessly mashing the basic cast button to orchestrating beautiful, devastating symphonies of magic.
By utilizing the map locations provided, equipping a crowd-control heavy spell loadout, and managing your potions and plants effectively, you will be tearing through dark wizards and trolls with ease. Whether you are seeking the exclusive Thief’s Coat, farming your way to max level, or simply craving the rush of a massive wizarding duel, mastering these arenas is an essential part of the Hogwarts Legacy experience.
What is your favorite spell combo to use when the arena gets overwhelmed? Are you a fan of grouping enemies with Accio, or do you prefer the explosive power of Confringo? Let us know your ultimate Battle Arena loadout in the comments below!