Do you remember the exact moment you first watched Harry step into Ollivanders, surrounded by floor-to-ceiling boxes of magic, waiting for the perfect wand to choose him? Every Potterhead dreams of experiencing that feeling. However, officially licensed replicas can be incredibly expensive and are often too fragile for active cosplay, while standard craft tutorials usually leave you with something that looks exactly like what it is: a stick covered in lumpy hot glue. If you are looking to create a genuinely authentic, DIY Harry Potter wand that boasts weight, texture, and cinematic realism, you have come to the right place.
After years of designing realistic cosplay wands, analyzing movie props, and perfecting woodworking and sculpting techniques, I have developed a foolproof method for crafting gorgeous, durable wands. You do not need a lathe or advanced carpentry skills. This comprehensive guide will walk you through transforming basic craft supplies into a movie-quality, homemade Harry Potter wand that feels ancient, powerful, and uniquely yours. Let us bring a little bit of magic into the muggle world.
The Anatomy of a Perfect Wand
Before you plug in your glue gun or reach for the sandpaper, it is crucial to understand what makes a wand look and feel authentic. In the wizarding world, wandlore is an ancient and complex magic. A wand is not just a branch; it is an extension of the wizard. When designing your realistic cosplay wand, keeping the traditional anatomy in mind will elevate your final piece from a mere craft project to a believable artifact.
Wandlore 101: Length, Wood, and Core
According to Mr. Ollivander, wands generally measure between 9 and 14 inches. Wands shorter than 9 inches are exceedingly rare and usually select those whose character lacks a certain robustness. Wands longer than 14 inches are typically drawn to individuals with physical peculiarities or highly dramatic personalities. For the best aesthetic balance and handling, aiming for a length of 10 to 13 inches is ideal for most adult and teen cosplayers.
The “wood” and “core” you envision will dictate your design. Are you crafting a dark, rigid ebony wand with a dragon heartstring core, suited for martial magic? Or a springy, light willow wand with a unicorn hair core, perfect for charms? Let your intended character’s traits guide your design process.
 Character Replicas vs. Original Designs
When embarking on a wooden wand tutorial, you face a distinct choice: do you replicate an iconic wand from the films, or do you design a completely original piece?
-
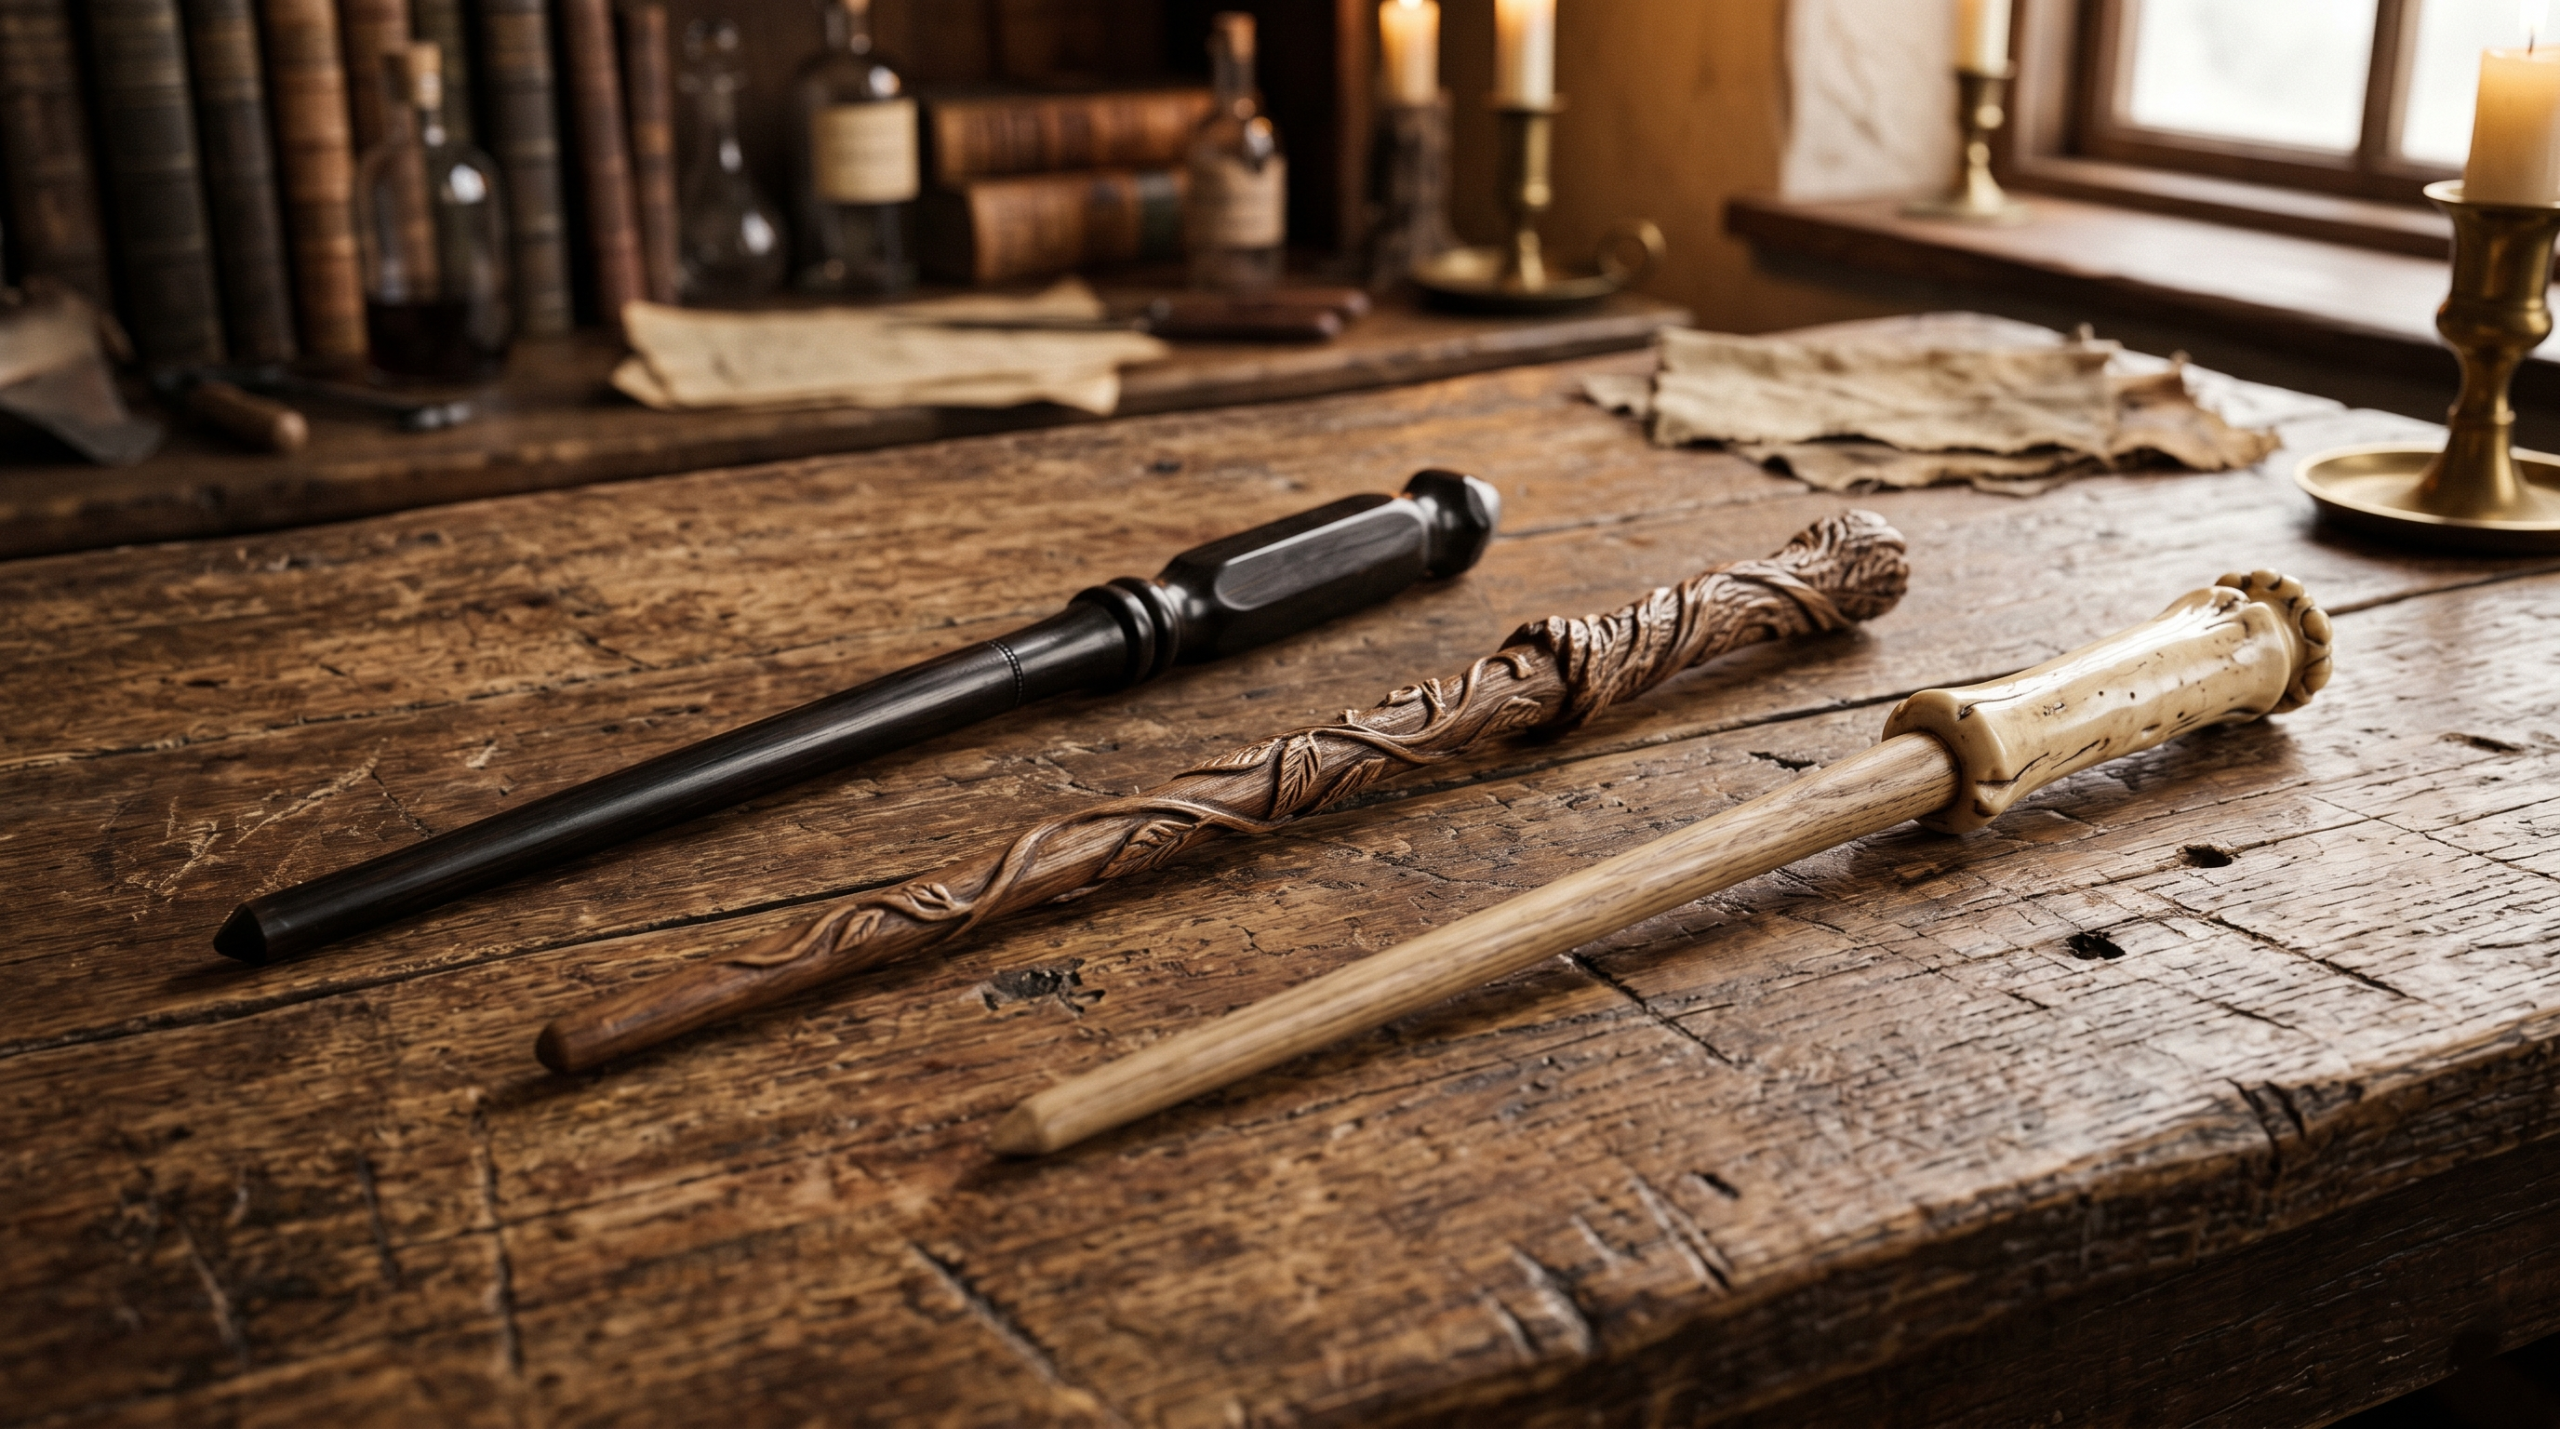
Replicating Existing Wands: If you are building a replica—like the infamous Elder Wand, Hermione Granger’s elegant vine wand, or Lord Voldemort’s bone-like yew wand—you will need to study reference photos carefully. Pay close attention to the silhouette, the handle-to-shaft ratio, and the specific color tones.
-
Original Designs: Designing your own wand allows for endless creativity. If you choose this route, remember the “Rule of Thirds.”
Expert Insight: The Rule of Thirds in Wand Making
To ensure your wand looks balanced and handles well, divide its total length into thirds. The bottom third should serve as the handle (often thicker, more textured, or separated by a distinct pommel or ring). The top two-thirds comprise the shaft, which should gradually and elegantly taper to a rounded point. This ratio ensures visual harmony and a comfortable grip.
Essential Materials and Tools List
The secret to a successful hot glue wand craft lies entirely in the quality of your materials and the specific tools you use. While this is a highly accessible and budget-friendly project, cutting corners on the specific types of glue and paint will drastically affect your final result.
The Core (The Base)
Your base provides the structural integrity of the wand. Flimsy bases will result in wands that snap or warp.
-
Hardwood Dowels: This is the gold standard. A 1/4-inch to 3/8-inch oak or birch dowel (cut to 10–14 inches) offers the perfect weight and sturdiness.
-
Chopsticks or Bamboo Skewers: If you are crafting wands in bulk for a Harry Potter-themed party, thick wooden chopsticks are an excellent, budget-friendly alternative, though they are on the shorter side.
-
Tapered Spindles: Available at hardware stores, some small chair spindles already feature gorgeous, carved handles and tapered ends, cutting your work in half.
 The Magic (The Shaping)
-
High-Temp Hot Glue Gun & Extra Sticks: Do not use a low-temp glue gun. High-temperature glue flows more smoothly, levels out naturally, and gives you crucial extra seconds to manipulate the shape before it hardens. You will need a lot of glue sticks, so buy in bulk.
-
Sandpaper (Coarse and Fine Grit): 60-grit for shaping the wood, and 220-grit for smoothing it out.
-
Air-Dry Clay or Epoxy Putty (Optional): If you want an exceptionally heavy, thick handle or wish to sculpt precise geometric shapes (like the hexagonal handle of Sirius Black’s wand), epoxy putty (like Milliput or Apoxie Sculpt) is superior to hot glue.
The Finish (The Paint)
-
Acrylic Craft Paints: You need a dark primer (black or dark brown) and various wood tones (burnt umber, raw sienna, ochre). For metal accents, gold, silver, or bronze acrylics are perfect.
-
Small Paintbrushes: One standard brush for base coats, and one stiff-bristled, dry brush for detailing.
-
Matte or Satin Clear-Coat Sealant: This is non-negotiable. Hot glue and acrylic paint can become sticky over time. A spray sealant locks in your paint job and removes the cheap, plastic sheen.
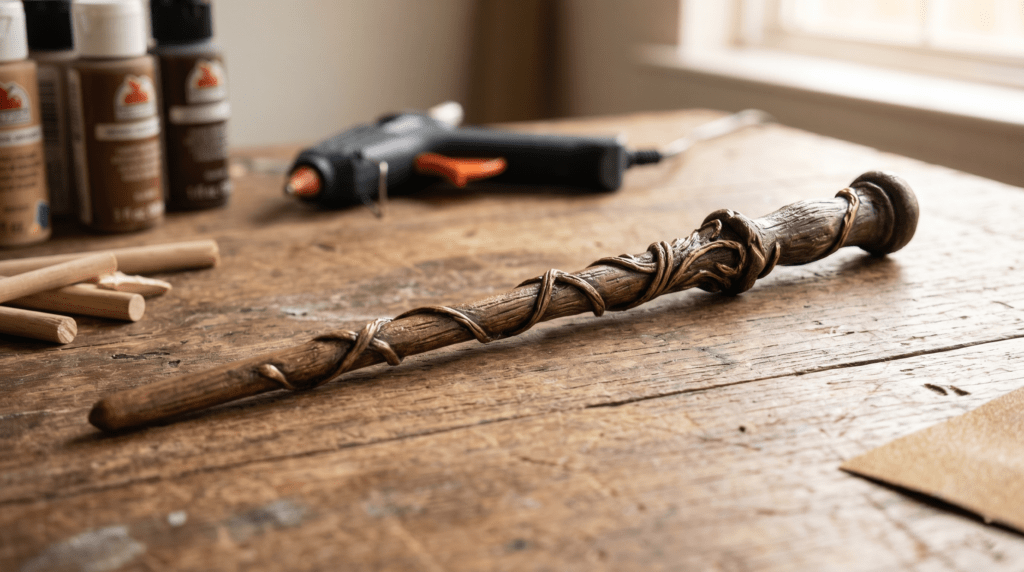
Step-by-Step Guide to Crafting Your DIY Harry Potter Wand
Clear your workspace, plug in your hot glue gun, and let the magic begin. Follow these five steps meticulously to transform your raw materials into an Ollivanders-worthy artifact.
Step 1: Prepping the Base (Sanding and Sizing)
The biggest mistake beginners make in a wooden wand tutorial is leaving the tip of the dowel blunt. Real wands are aerodynamic and gracefully tapered.
-
Measure and Cut: Determine your desired length (e.g., 12 inches) and cut your dowel using a small hand saw or heavy-duty clippers.
-
Taper the Tip: You want the wand to be thicker at the handle and gradually thin out toward the casting end. If you are using a 1/4-inch dowel, you can actually use a standard metal pencil sharpener to get the initial taper at the tip.
-
Sand for Smoothness: Once the tip is somewhat pointed, take your coarse 60-grit sandpaper and manually sand the top half of the wand to smooth out the taper. You do not want a needle-sharp point (which is dangerous and prone to breaking), but rather a gently rounded tip. Follow up with 220-grit sandpaper until the wood is completely smooth to the touch.
Step 2: Sculpting the Handle and Core Structure
This is where your wand takes on its personality. The handle needs to be comfortable to hold and visually distinct from the shaft.
-
Map it Out: Use a pencil to mark where the handle will end. Typically, this is 3.5 to 4.5 inches from the base.
-
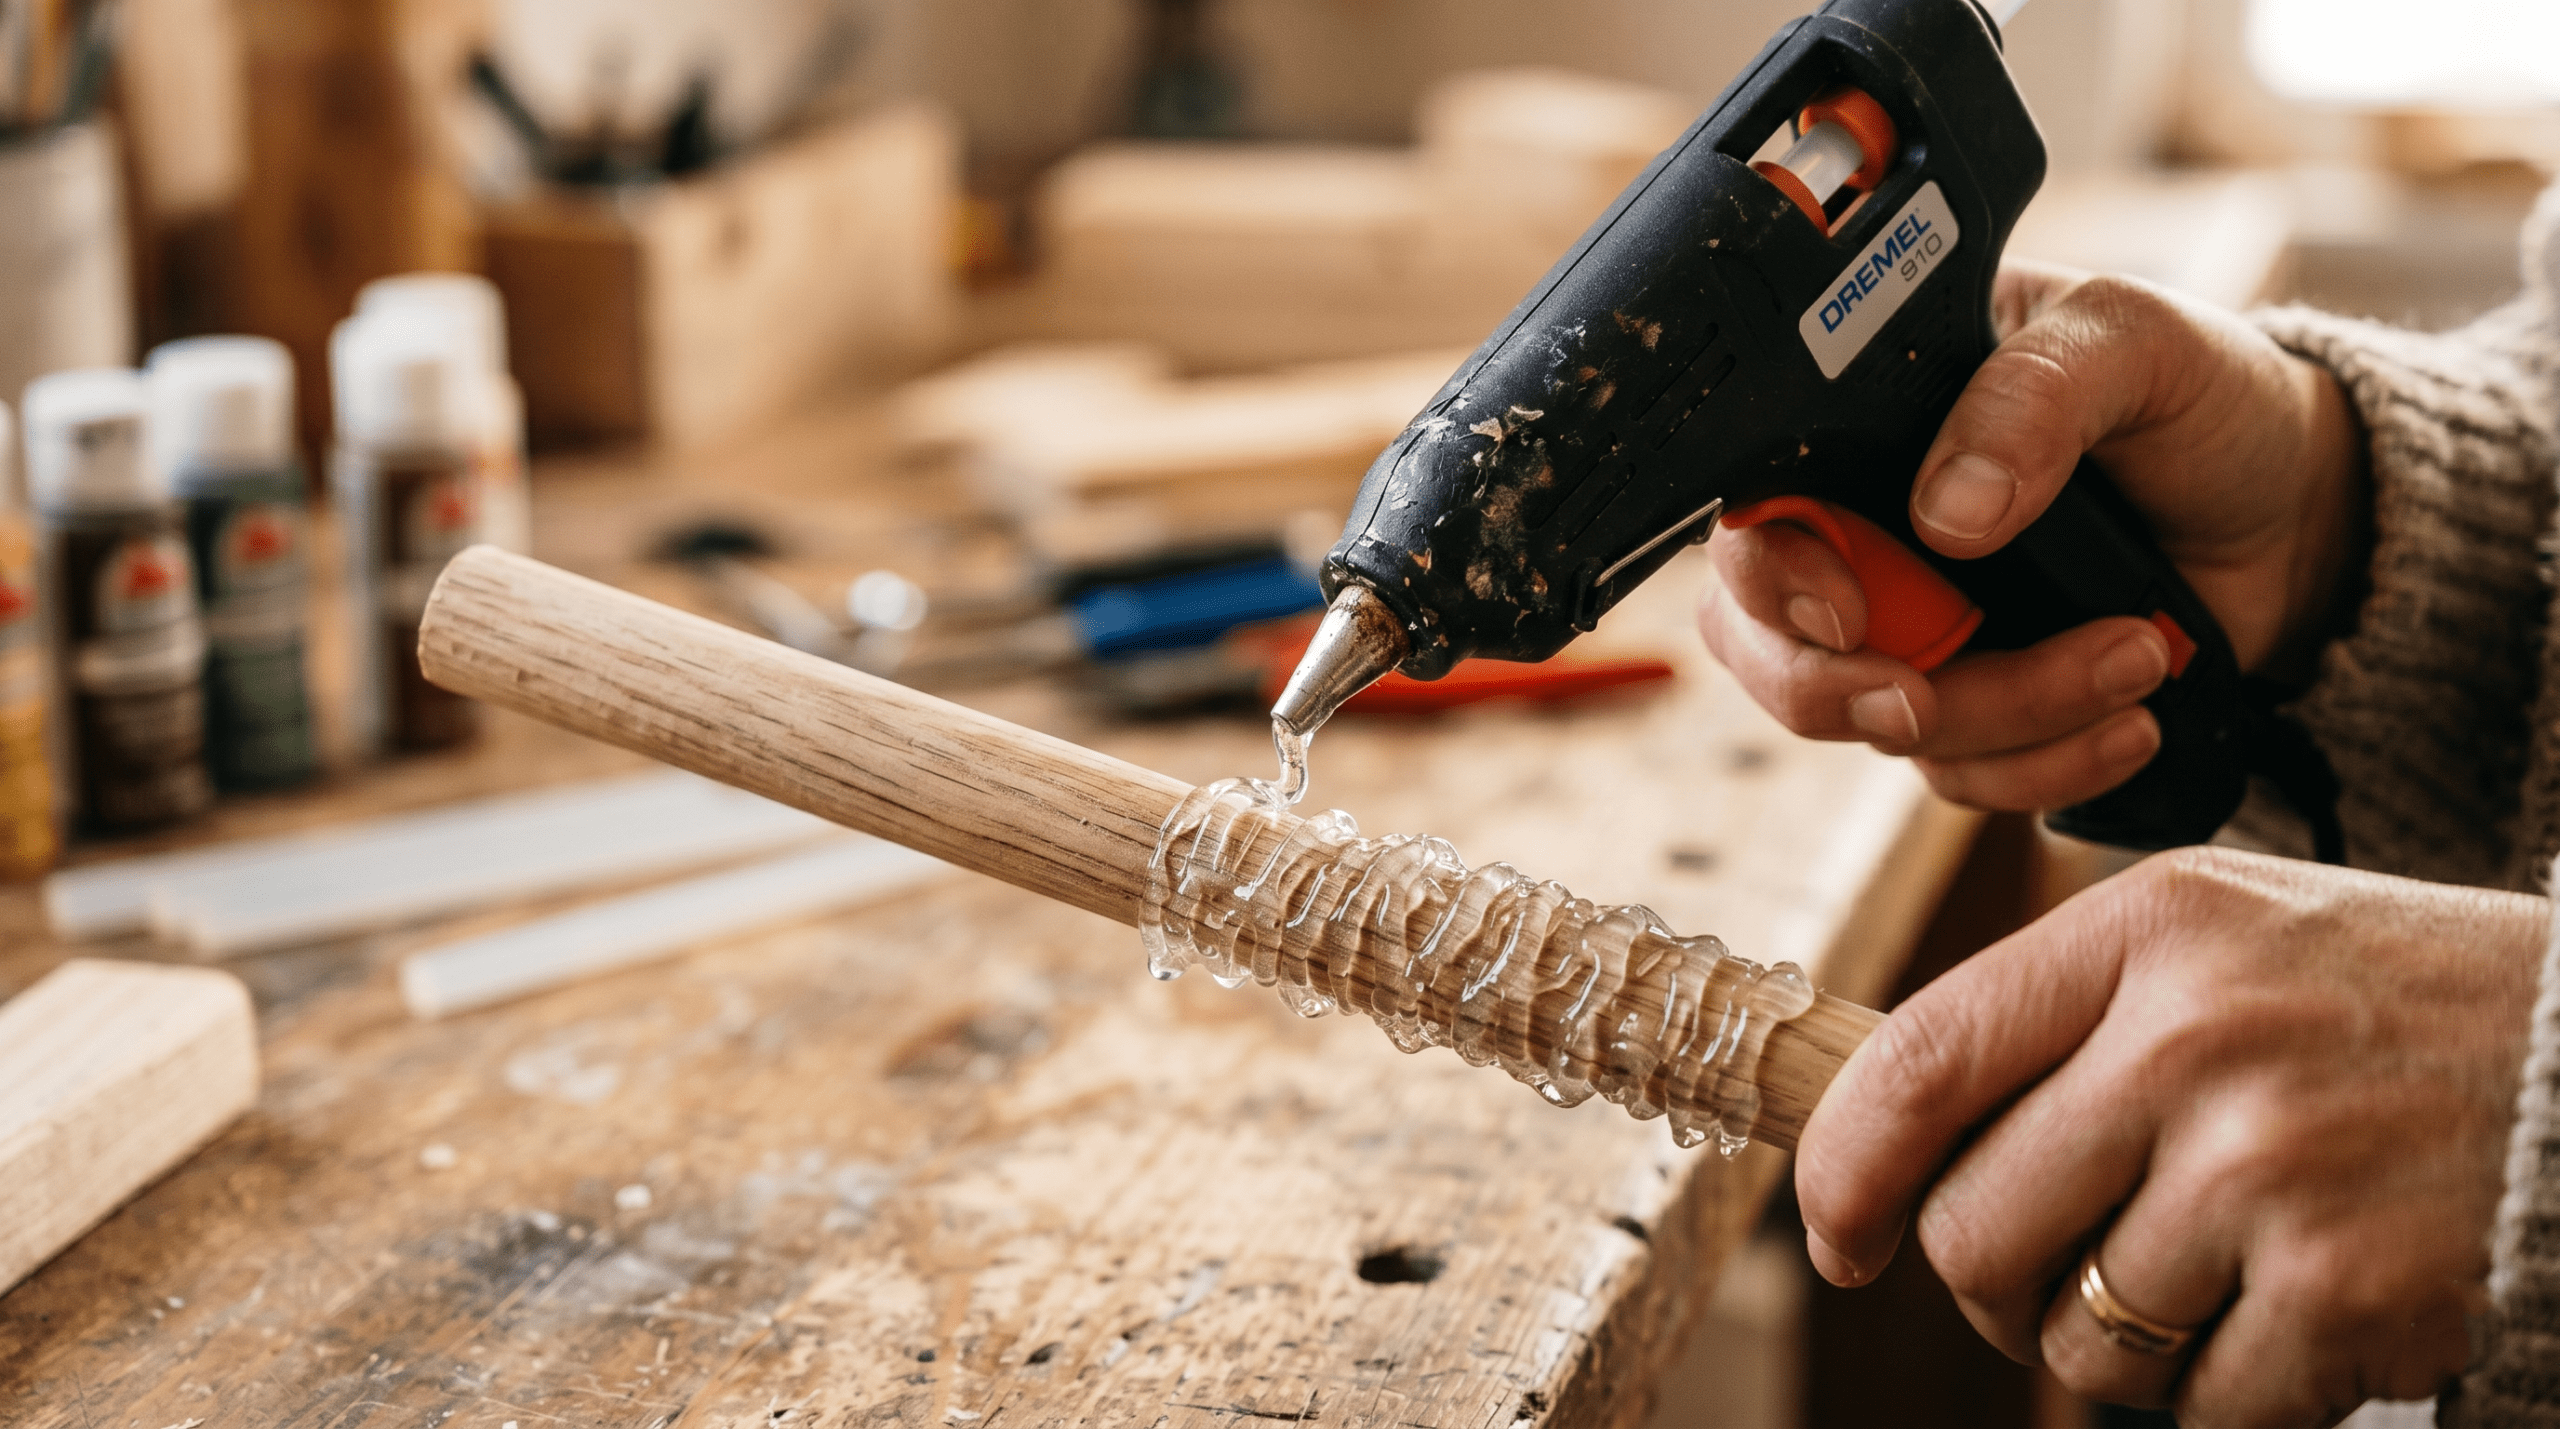
Build the Foundation: Starting from the bottom of the dowel, begin applying a thick, even layer of high-temp hot glue.
-
The Twirl Technique: As you apply the glue, constantly rotate the dowel in your hands. High-temp glue is quite liquid; if you hold the wand still, the glue will sag and drip, ruining the shape. By continuously twirling the wand parallel to the floor, the glue cools evenly, creating a naturally cylindrical, smooth build-up.
-
Create the Pommel: Build up a slightly thicker bulb of glue at the very base of the handle. This acts as a pommel, stopping your hand from slipping off the end and providing excellent visual balance.
 Step 3: Adding Intricate Details and Texture
Once your base handle is cool and solid to the touch, you can begin applying the intricate textures that make a realistic cosplay wand truly pop.
-
The Wood-Grain Look: Apply a thin layer of glue along the shaft of the wand. Before it fully cools, take a toothpick and drag it vertically through the glue. This creates deep striations that, once painted, will look exactly like ancient, weathered wood grain.
-
The Vine Look (Hermione Style): To create vines wrapping around the shaft, squeeze a very thin line of glue while slowly rotating the wand and moving upward. Once the first vine cools, add tiny teardrop shapes along the vine to simulate leaves.
-
The Bone Look (Voldemort Style): Build up smooth, uneven nodes along the handle. To get that perfectly smooth bone texture, dip your finger in cold water and gently rub the hot glue right before it sets (Warning: Be extremely careful not to burn yourself; the water provides a temporary thermal barrier, but the glue is still scalding inside).
-
The Elder Wand Nodes: Create evenly spaced spheres of glue along the shaft. Once cool, use a craft knife to carefully carve tiny dimples into the glue spheres to mimic the distinctive texture of the Elder Wand.
Step 4: Priming and Base Painting
You have finished sculpting, and your wand is currently a mess of pale wood and frosted hot glue. Painting is what unifies the piece.
-
The Dark Primer Coat: Never start by painting your wand light brown. To achieve a realistic, antique look, your first coat should be entirely black or incredibly dark brown (Burnt Umber mixed with Black).
-
Coverage: Paint the entire wand, ensuring you push the bristles into every single crevice, swirl, and wood-grain line you created. No wood or clear glue should be visible.
-
Drying: Allow this base coat to dry completely. It will look like a solid, dark, uninteresting stick right now, but this dark undercoat is the secret to creating artificial shadows and depth in the next step.
Step 5: Dry Brushing and Weathering for Realism
If there is one single step that transforms a cheap hot glue wand craft into a movie-quality prop, it is dry brushing. This technique highlights the raised textures while leaving the dark primer in the recesses.
-
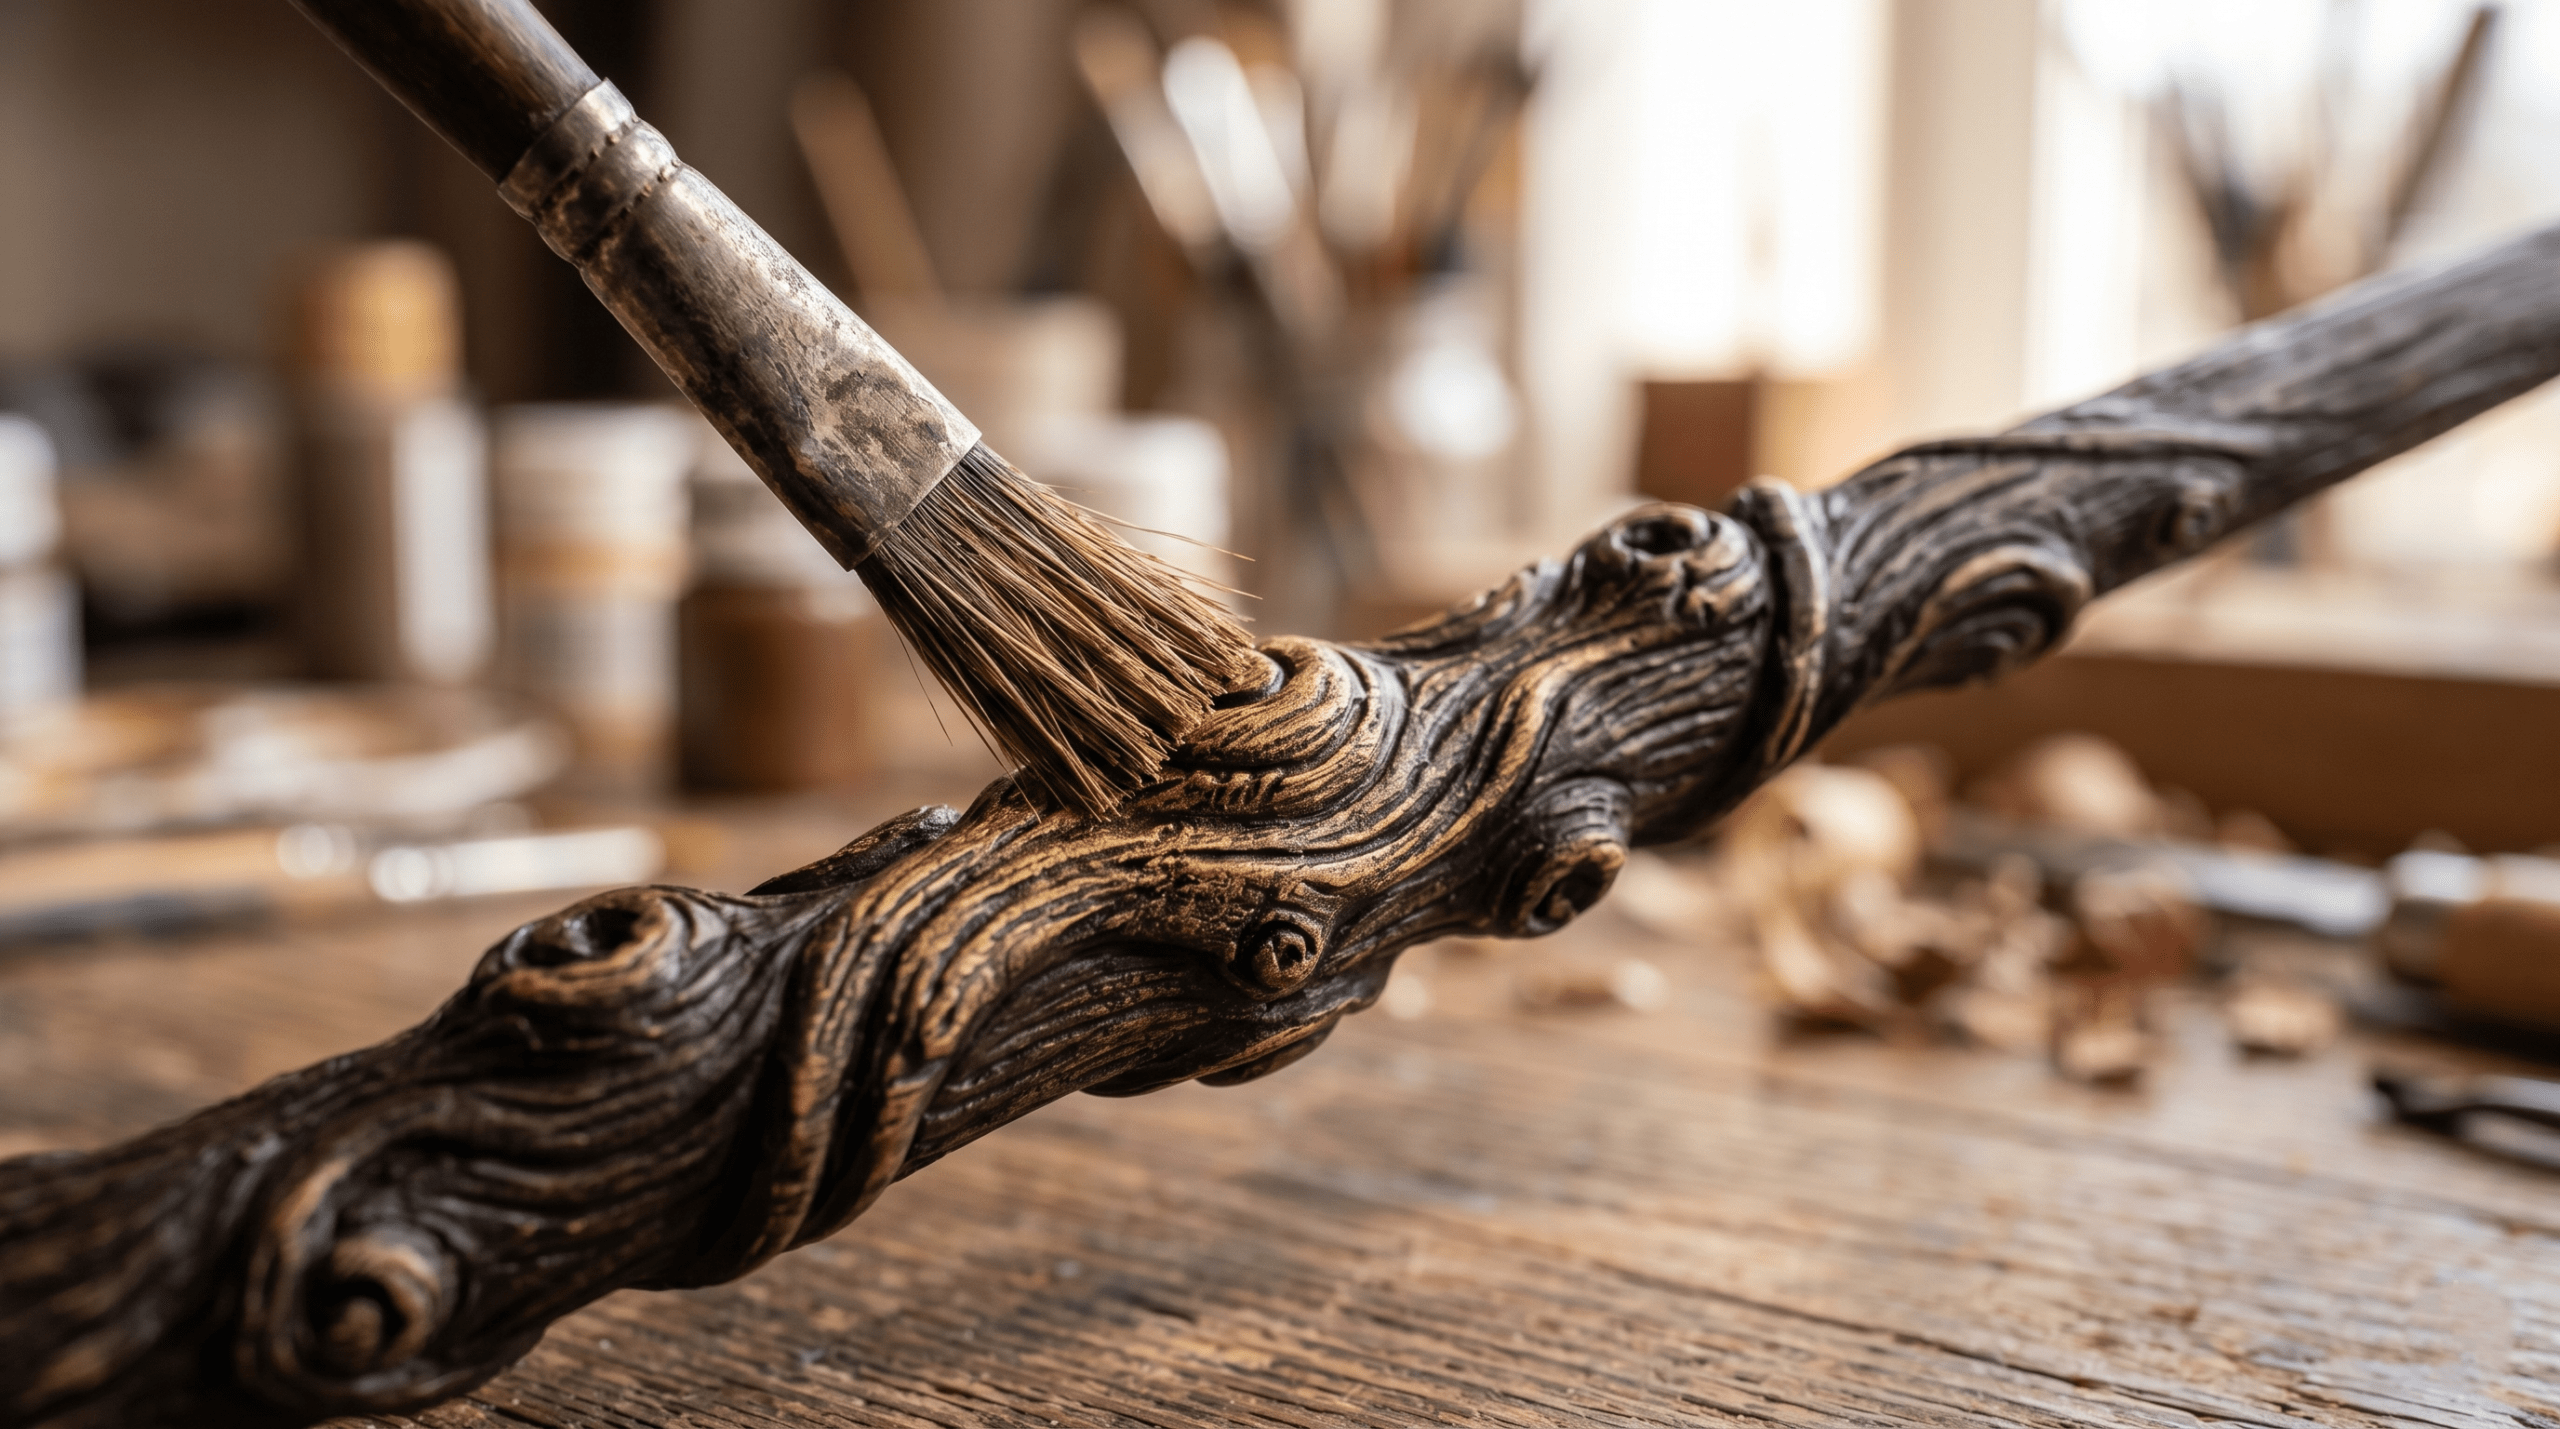
Prepare the Brush: Take a stiff-bristled brush and dip just the very tip into a lighter color (e.g., a warm chestnut brown, raw sienna, or metallic gold).
-
Wipe it Off: Wipe almost all the paint off the brush onto a paper towel until the brush feels dry.
-
Flick the Textures: Gently and rapidly flick the dry brush back and forth across the textured areas of your wand. The lighter paint will only catch on the raised edges of the glue and wood. Instantly, the dark base coat in the crevices will look like deep, natural shadows, while the raised areas will look like polished, aged wood.
-
Layering Colors: For maximum realism, use two or three layers of dry brushing. Start with a medium brown, move to a lighter golden-brown on just the highest peaks of the texture, and perhaps add a tiny hint of black around the handle to simulate years of dirt and magical wear.
-
Seal the Magic: Once the paint is 100% dry, take the wand outside and spray it with a matte or satin clear coat. This removes the tacky feeling of acrylics on hot glue and gives the wand a beautifully professional, cured finish.
 Taking Your Wand to the Next Level
You have completed your ultimate DIY Harry Potter wand. But if you want to push your craftsmanship even further to achieve true Ollivanders replica status, consider these advanced enhancements.
Adding “Cores” for Weight
A common complaint about wooden wands is that they feel too light. To fix this, before you add your hot glue handle, you can drill a small, shallow hole into the base of the wooden dowel. Insert a heavy steel hex nut, a stack of small metal washers, or a dense ball bearing into the hole, and seal it shut with hot glue. This mimics inserting a “magical core” and shifts the center of gravity to the handle, making the wand feel incredibly satisfying and heavy in the hand.
Crafting a Display
A masterpiece deserves a proper showcase.
-
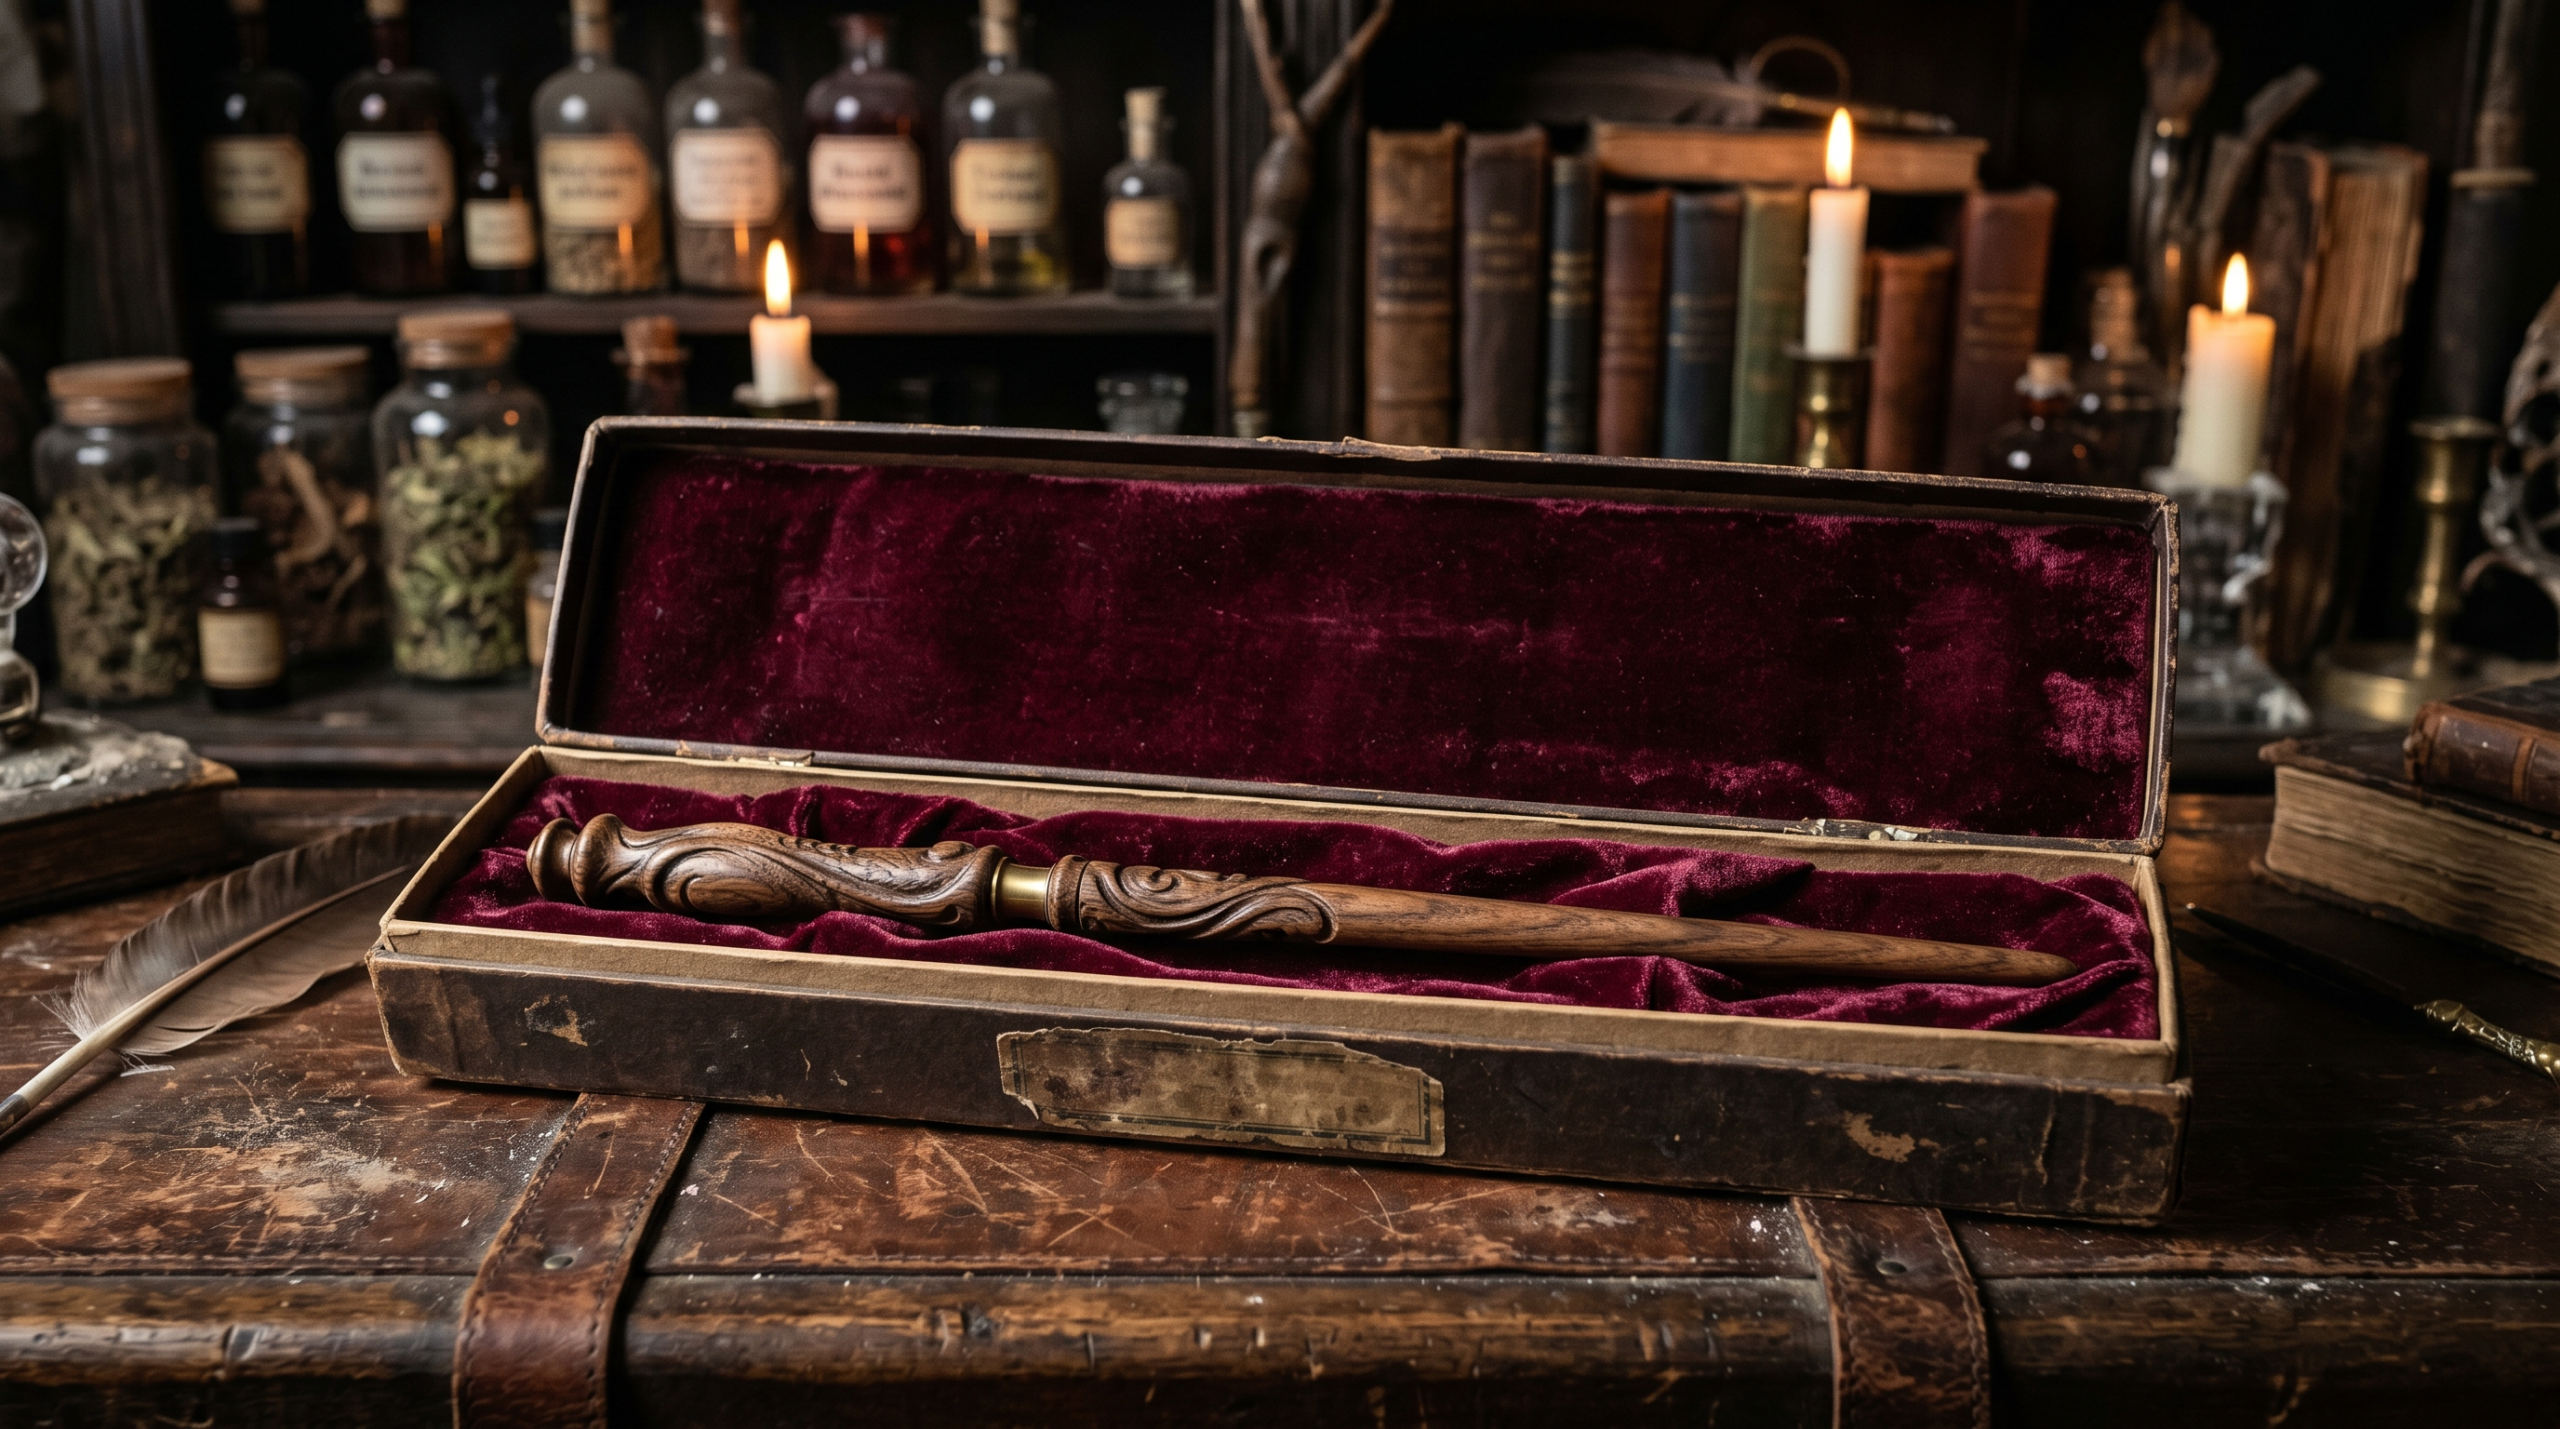
Ollivanders Wand Box: Purchase a simple cardboard jewelry or necklace box. Line the inside with crushed velvet or cheap faux silk over a layer of batting or foam. Paint the outside of the box in muted, dusty colors (burgundy, olive green, or navy) and print out a vintage “Ollivanders: Makers of Fine Wands Since 382 B.C.” label for the lid.
-
Wooden Display Stands: Two simple wooden pegs glued to a stained wooden plaque make for a gorgeous, minimalist wall display for your cosplay props.
 Frequently Asked Questions (FAQ)
What is the best wood to use for a DIY wand?
For durability and weight, hardwoods like oak, birch, or mahogany are exceptional choices. You can easily find oak dowels at most home improvement stores. While pine and balsa wood are much easier to cut and sand, they are quite brittle and can snap easily if stepped on or dropped during a convention.
Can I use a low-temp glue gun instead?
You can, but it is highly discouraged for this specific technique. Low-temp glue dries and hardens almost instantly upon leaving the nozzle. This creates lumpy, uneven textures and does not allow you the time needed to twirl the wand and let the glue settle into smooth, organic shapes. High-temp glue gives you a working window of about 15 to 30 seconds to manipulate the shape.
How do I make my DIY wand look like real wood instead of painted plastic?
The secret is avoiding glossy finishes and utilizing the dry-brushing technique. Real wood has a matte or satin finish and features variations in color. By starting with a black/dark brown base and dry brushing lighter shades of brown over the top, you mimic the natural high and low lights of wood grain. Always finish with a matte clear-coat spray.
Is it safe for kids to make these wands?
The painting and sanding steps are perfect for children. However, the high-temp hot glue step requires adult supervision or execution. High-temp glue can cause severe burns, so an adult should handle the sculpting phase, allowing the child to take over once the glue has completely cooled and solidified.
Crafting your own DIY Harry Potter wand is more than just a fun weekend project; it is a rite of passage for fans of the wizarding world. By moving beyond simple painted sticks and utilizing foundational sculpting and dry-brushing techniques, you ensure that the wand you create is a durable, breathtaking piece of art. Whether you are gearing up for a cosplay convention, preparing for a trip to the Wizarding World theme parks, or simply want a magical artifact to display on your bookshelf, this movie-quality replica will serve you well. Remember that the wand chooses the wizard, but the wizard holds the power to craft exactly what they need.